I kind of like “clear enough” nights. Those nights when the weather conditions are less than ideal, but when you can still see some stars. These are the perfect nights to get outside and mess around without having any anxiety about the results. In other words, nights when you can be out just for the joy of being outdoors. The perfect kind of night for using N.I.N.A. for the very first time. All to begin to figure out if N.I.N.A. is the tool that can help me take my astrophotography game to the next level.
What Do I Need N.I.N.A. For?

When I opened up N.I.N.A for the first time, it became immediately clear that this tool supports an astrophotography setup that far exceeds my humble setup. So the first question I need to answer before I get lost is, what do I really want to get from using N.I.N.A.? Let me set a baseline that reflects my astrophotography needs right now.
Equipment:
- Canon EoS 250D camera
- Samyang 135mm lens
- Bahtinov mask for focusing
- Computer-aided focuser (no ASCOM driver)
- EQ mount with RA movement only (no ASCOM driver)
Bare Minimum Tasks:
- Focusing the camera
- Plate solving
- Planetarium integration for framing
- Polar alignment
- Imaging
This is what I need from a software tool today. Of course, I have grand plans for autofocusing and autoguiding at some point in the future. But right now, I just want to keep it simple. I’m not going to go into any detail here, but getting my camera set up in the program was intuitive and easy enough to do.
Planning My N.I.N.A. Session
I wasn’t going to get too ambitious with my first experience with N.I.N.A. To start, I want to test focusing my lens and polar alignment. If I can’t do these two things quickly and accurately, there’s no reason to change my current process. For polar alignment, I’ll need to have plate solving set up so that is the first task.
Plate Solving
Setting up plate solving in N.I.N.A. couldn’t have been any easier. In N.I.N.A., I simply navigated to the Options > Platesolving screen and selected Platesolver2 as my plate solver and ASTAP as my blind solver. As I had already installed Platesolver2 with APT, I simply needed to point N.I.N.A. to the location of the executable. For ASTAP, it was a little more involved. You have to download and install the program and then download and install a catalog. As I’m mostly working with wide-field astrophotography, the V17 catalog is the right choice for me. Then again, I just pointed N.I.N.A. to the installation.
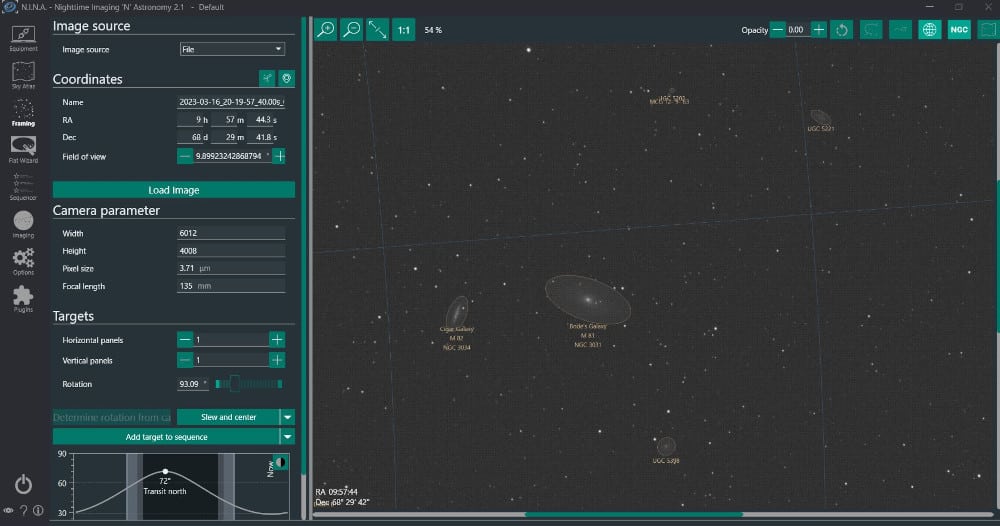
To test the setup, I loaded an image that I previously took in the Framing tab. For the Image source, I selected File. Then I clicked “Load Image” which brought up the Windows File Explorer. After selecting my file, the solver kicked in and plate solved my image in about 3 seconds. I could hardly believe how fast it worked. Very cool! And the annotations of the objects in my image. Groovy! OK N.I.N.A., that’s a pretty good first impression.

Focusing
My plan for focusing my lens is to use the Imaging tab and then just run my camera in live view while driving the Samyang 135mm Focuser. N.I.N.A. has a Bahtinov analyzer that should help me really dial things in.
Polar Alignment
N.I.N.A. has a plugin called Three Point Polar Alignment. The more I read about this from the documentation, the more excited I get. Basically, you point your camera anywhere in the sky and then take three images while rotating around the RA axis by 10 degrees between each photo. The images are plate solved and then instruct you as to the necessary mount adjustments. The plugin can run fully automated or in manual mode – awesome!
Why am I so excited about this? Because thus far I’ve been polar aligning in SharpCap with my imaging camera. I have accepted that there is no way for me to ensure that my imaging camera is perfectly aligned with the axis of rotation of my tracker. So I’ve been imaging with a – hope it’s a good enough approach. Some nights have been better than others. But N.I.N.A.’s approach renders any concerns about this moot. In theory, I should be able to get much better polar alignment based on my setup by using N.I.N.A.
Only one problem… How do I move my mount 10 degrees between photos? I really don’t want to be loosening and tightening my tracker mount head to rotate along the RA axis. There is no way to ensure the imaging train remains fixed in that scenario. Well, nothing a little code can’t fix :). I took Gamma apart to program a new feature that rotates the tracker in 10-degree increments. If I press both the slew buttons at the same time, the tracker will rotate 10 degrees. For safety, I can cancel the move by toggling the tracking switch. Problem solved.
Using N.I.N.A. for the First Time
At some point, you just have to get to it. So on the first viable night for testing, I headed out into the backyard to test focusing and polar alignment with N.I.N.A. Let’s just say that all did not go according to plan.
I Can’t Focus ?!?!?!
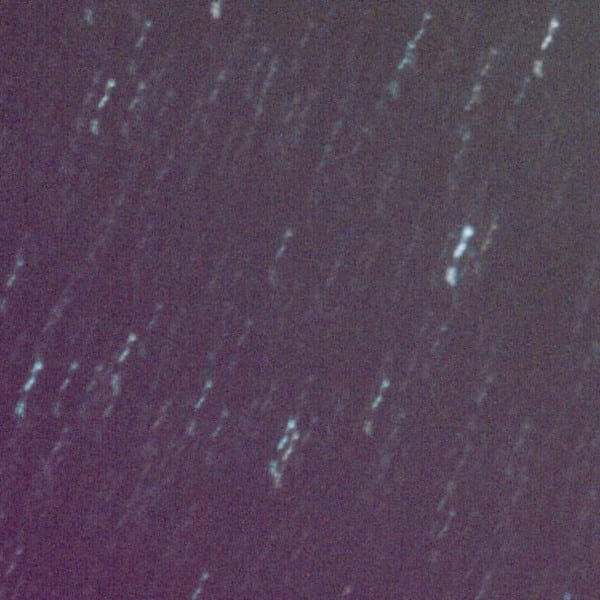
I found a bright star that I thought would be good for focusing and lined it up using the live view from the Imaging > Imaging/Image tabs. Well, the live-view image quality wasn’t quite what I was expecting. Especially after putting the Bahtinov mask on the lens cover. It was dark, extremely grainy, and nearly impossible to make out the spikes from the Bahtinov mask. I probably fussed with this for a good 20 minutes or so. I just can’t seem to figure out how to bring my lens into focus.
The Bahtinov analyzer was no help at all in the live view. It just hopped all over the place and there was no consistency in the results. And even when using a 4-second snapshot, I couldn’t seem to figure it out. So I made the executive decision to just eyeball it. And I accepted that it wasn’t going to be that good. Well, in fairness, it didn’t end up being a disaster, but it wasn’t great.
After thinking about this later in the evening, I think this was a failure of expectations. Not a failure of the tool. I expected my focusing process to be the same in N.I.N.A. as I developed it using APT. Clearly, that is not the case. And based on everything that I’ve seen with N.I.N.A. thus far, I don’t believe for a second that there isn’t a way to really dial in my focus. In other words – It’s me, not N.I.N.A. So I need to do some research and build a better process for focusing.
Polar Alignment – Everything I dreamed It Would Be
After my focus adventure, I was a little concerned about how things were going to go with polar alignment. But to give me the best chance of success, I decided to center my imaging target (Bode’s Galaxy again) on the RA axis. This way, I could tighten down the mount head once and then just slew on the RA axis for both polar alignment and imaging. That is, I can preserve the alignment of my image train once the polar alignment is finished.
I lined everything up and then kicked the routine off in manual mode. After the first image was captured, I paused the routine, told Gamma to move 10 degrees, and then unpaused. I had to repeat that one more time in the sequence. The images were great. Plate solving was lightning fast. Gamma was a champ at moving. Things were a little finicky when it came time to adjust the wedge mount, but after a few minutes, I was under 1 minute of polar alignment error. Good enough for the first time. But how good was it?

It was wicked good! Perhaps the best polar alignment I’ve ever had during an imaging session. While I wasn’t really planning on imaging, I wrote a simple sequence and let it run for about two and a half hours. I wasn’t interested in the image (focus remember?), but I wanted to see how the tracking would perform. With my setup, over that time my image drifted 26 pixels in the x direction and 125 pixels in the y direction (roughly). At 2.5 arcseconds/pixel, I drifted 65 arcseconds in the x direction and 325 arcseconds in the y direction. Over two-plus hours, that equates to an average drift of 0.5 arcseconds/minute in the x direction and 2.4 arcseconds/minute in the y direction.
For some people, that might be rubbish. But for me, that is pretty darn good. And, this was my first time doing this using N.I.N.A. so I know it can only get better as I get comfortable with the routine. Additionally, I handled my camera about halfway through the session, so I probably knocked things around there as well. Good stuff!!!
I Didn’t Mention How I Framed My Target…
Because I was dumb lucky. When I went to line up the RA axis prior to polar aligning, I pointed the camera in the general direction of where I knew Bode’s galaxy was. I nailed it. Bode’s galaxy was on the bottom of my frame right in the middle. I’ll take it wherever I can get it. But that did get me thinking. How am I going to do this in a way that doesn’t rely on me being lucky?
The short answer is, I don’t know. Along with focusing, I’ll need to do a little research on this. I liked that APT would output my field of view in Stellarium. I’m assuming that there must be some way to do something similar in N.I.N.A. Besides, I really don’t want to go back to comparing plate solves in Stellarium to figure out where my target is. More to come on this front I’m sure.
I Learned A Lot Using N.I.N.A. for the First Time
Well, this was all rather exciting. I’m coming away with a lot of things to think about as well as a lot of things to be excited about. All things considered, I couldn’t be happier with how things went after using N.I.N.A. for the first time. My initial impression of N.I.N.A. is extremely positive despite some of the issues that I encountered. For right now, I’m just going to chalk those issues up to ignorance on my part. I’m sure I’ll get more comfortable with the tool in time.
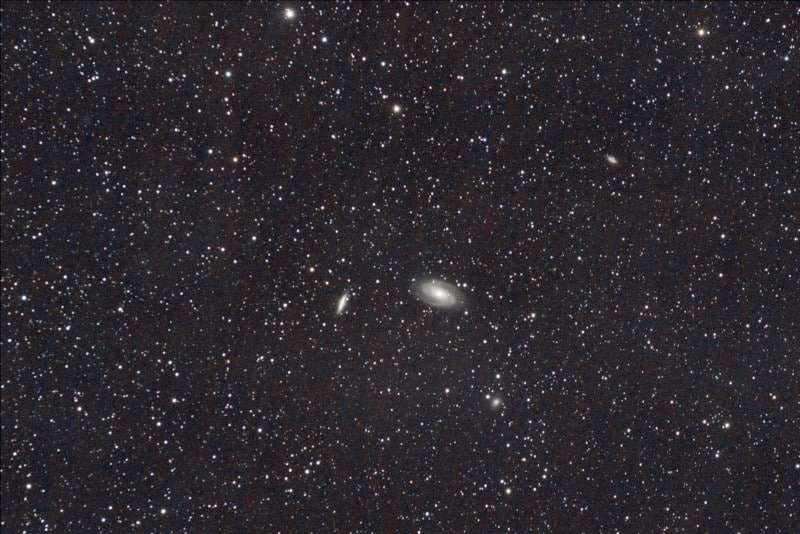
For my trouble though, here is the stacked result from my low-expectations imaging session.

