![]()


Those wizards over at Siril.org dropped their latest version 1.2.0-beta2 back in March. I wasn’t really paying attention at the time because I just didn’t have anything to process. But after downloading this update last week, I was quite shocked to see all the new features they’ve incorporated into the platform. Talk about major changes! Up until this moment, I’ve been using Siril as a postprocessing tool. However, Siril is hard-charging towards becoming part of my imaging session now too. I haven’t had an opportunity to kick the tires on all the new stuff Siril has to offer yet. But I thought I’d pen a few words on some of the cool stuff I discovered while testing some of the new Siril features.
I Was Most Excited About …
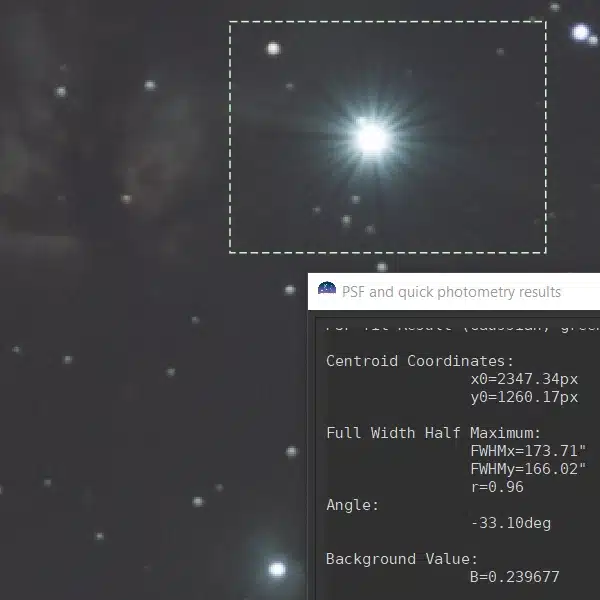
Livestacking. Siril released an experimental feature in the latest beta2 release that processes and stacks photos as they are taken. I’ve actually never stacked my photos during an image session before. So I was definitely excited to give this a go. Now before I tell you how this went… If you’ve read any of my posts, you’ll know that I’m a card-carrying knucklehead. I actually had several screen captures of my using this feature – which I inexplicably deleted after my imaging session. Well, I can explain – kind of. I was freeing up space on my hard drive to properly process my photos. My live stacking files got caught up in the melee. I managed to only get one snap of the livestacking session, but only after I cropped and significantly processed the image (yes, you can process the livestacking image).

What I Liked About Livestacking
All that said, let me share my thoughts on this feature. Full stop, I absolutely love this feature. It was easy to set up, ran without a hitch, and didn’t interfere at all with my imaging session managed by N.I.N.A. All I needed to do was to set my Siril home directory to the location where my photos were being saved, click on the livestacking button, and click the play button. Everything Siril is doing during livestacking is registered in the console window which is really cool. Each new photo took about 7 seconds to process before updating the image and the image itself is quite good. This definitely gave me a good sense of how my final image was going to turn out. And finally, I like seeing all the statistics about noise, integration time, and etc. I’m definitely a fan.
What I Didn’t Like About Livestacking
This is clearly listed as an experimental feature so it’s hard to muster the strength to say anything critical. But… For starters, I couldn’t figure out how to zoom into the image. I didn’t have a mouse hooked up to my computer during my imaging session, so maybe that was part of my problem. I’ll definitely check this on my next night and to be honest, this is a very minor problem. More significantly, however, was Siril’s use of disk space during my imaging session.
Siril stores all the intermediary files much in the same way that it does during a normal process run. There’s nothing inherently wrong with this approach. But when you’re doing shorter exposures, like 30 seconds in my case, it absolutely bleeds the hard drive. Disk clean-up is the last thing I want to be focusing on while imaging. So no joy. It looked like there was some kind of management that was happening in situ. But I couldn’t tell if this was Siril or Microsoft and I didn’t want to risk crashing my computer investigating further. I’m hoping that as this feature develops, there will be an option to allow users to keep or remove the intermediary files. (Update – While writing this post, the Siril team informed me that the temporary files will likely be managed in the future, but this isn’t yet planned – kudos to them for their quick response!)
New Image Processing Features
I haven’t finished testing all of the new Siril features yet, but there are a couple that I have sunk a little of my time into exploring. Siril has added a Noise Reduction dialog to its arsenal of tools. This is something that I have been doing once in GIMP. Now I have the opportunity to denoise my image right in Siril. This is especially handy since as of the 1.2.0-beta2 drop, Siril now allows users to run the Starnet CLI to create starless and star mask images. Normally, I take my Siril image and run it through Starnet prior to importing it into GIMP to finish processing. Now I can stretch my background and stars independently and recombine the output without having to leave Siril. This stretch makes use of another new feature called Generalized Hyperbolic Stretch Transformation. The generalized hyperbolic stretch provides more options to process the image than the general histogram transformation.
Siril was already able to get me 90% of the way done with processing an image. With the 1.2.0-beta2 drop, I really only need to do the final image scaling to process in GIMP. I have a lot to learn about getting the most out of all these new features. But in briefly testing these new Siril features, I already know that Siril will continue to be my go-to processing tool moving forward. Wouldn’t it be awesome if I could manage my whole imaging and processing with only 2 software tools? Yes, yes it would.
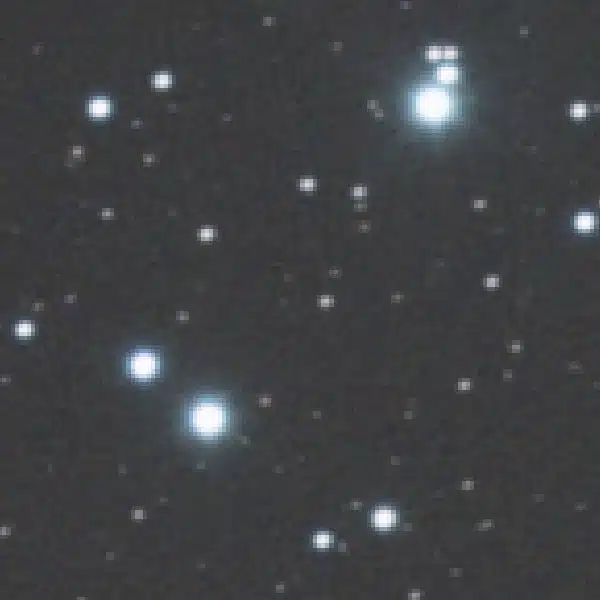
Anyway, here is how the Iris Nebula came out when just processing the image in Siril.

Final Thoughts
I think that I’m going to restack this image using drizzle. At a minimum, it will give me an opportunity to continue to play around with the new features in Siril. Besides, with all the new additions to Siril, I’ve got to put a new postprocessing routine together. So I think that is where I’ll begin.
On the next-gen tracker project – I don’t have a lot to report except that I’m really struggling to get my gears printed with the quality that I need to get this project to work. I’ll be experimenting with a few new finishing techniques to hopefully get them to the state that I need to print a working tracker. I really just want to wrap this project up but, “them’s the breaks”…