![]()


Friction continues to be the most frustrating limitation of the Lego Star Tracker project. As I got into this project, I was expecting the gears to present the most significant barrier to success. But it is friction. By their very nature, Legos are not frictionless building elements so I really have the deck stacked against me. So I started thinking… What I really need is a Lego ball bearing. But Lego doesn’t make ball bearings to the best of my knowledge. However, with a 3D printer at my disposal, a Lego ball bearing mod is definitely on the menu for the Lego Star Tracker.
The Trouble with Bearings
What sounds simple in theory, is never simple in practice. I was thinking to myself, right, let’s go down to the hardware store and pick up a package of small ball bearings and then get to it. But this is Poland. And in Poland, these kinds of parts aren’t something that the hardware stores are going to stock. I suppose I could order some online and get them in a few days, but I really want to get going on this mod.
Well, the hardware store doesn’t carry ball bearings, but they do carry replacement shower door wheels. And wouldn’t you just know it, the wheels are loaded with a ball bearing. Happy days. And $5 for a bag of 4 is doing wonders for my mood. I can cut the hard plastic wheel off and be left with just the metal ball bearing. Now, these are not high-quality parts, but I don’t necessarily need a high-quality part for this experiment. Let’s do this.
Making a Lego Ball Bearing Mod for the Lego Star Tracker
First thing’s first. I cut the plastic wheel off with a pair of wire cutters. I know, I just didn’t want to saw it off. But you can probably guess what happened. Yep, I ended up snipping myself. But hey, a little blood will add some character to this project (and it wasn’t that bad). Now, even though I got the smallest wheels I could find, the bearing is quite large with a 15mm diameter. So I’ll have to design a piece that is at least 4 lego studs wide and 2 bricks high. I think that will be doable.
The next thing that I need to do is build a lego piece in FreeCAD to house the bearing. I suppose I could have measured a couple of Lego pieces to figure out, but I knew I’d be able to find some dimensions online. I found just what I needed on Christoph Bartnek’s webpage. These plans were perfect for designing my own brick in FreeCAD.

Designing the Lego ball bearing mod was easy. Printing it was a bit of a different story. After I printed the first test piece, I saw that the printing tolerances were a little bit off. So back to FreeCAD to tweak things and then another print. Well, I had to make a 3rd part before I got it right. And for the final print, I used a raft to ensure I was getting the best possible part print. Now, while removing the raft, the knife I was using slipped and I ended up stabbing myself. Once again, not bad, but certainly painful. Turns out this is going to be a kind of theme for me moving forward…
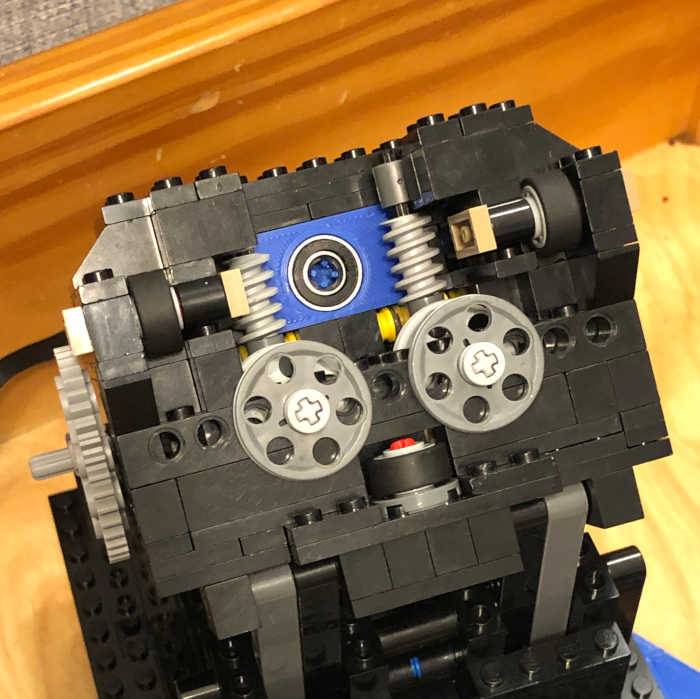
But, A few band-aids later, I was able to press the ball bearing into the part I printed. I swizzled a couple of pieces in the Lego Star Tracker to make room for the mod and then put everything back together.
Testing the Lego Star Tracker with the Ball Bearing Mod
After waiting about a week there was finally a break in the weather which allowed me to get outside. I leveled up the tracker and fired up the Polar Scope Align Pro app to begin polar aligning. But, I did do something a little different this time though. I decided to shut down all my electronics before using the app. I suspected that the computer, the camera, and the Lego Boost Motor were throwing off the iPhone compass that the app uses.
Turns out that I was bang on with my hunch. I let the app run for a good minute and there was no drift in where the app was telling to align. So I dialed in my alignment and then fired up the computer, the camera, and the motor. And whoop – the compass went catawampus. Now, I just had to avoid bumping the tracker off its alignment.
I just used my standard routine for setting up. I decided to shoot 30-second exposures at f/4 and ISO 400 to maximize my chance of success. One thing I did tweak was the Boost app program. I set it to rotate 24 degrees every second as opposed to 48 degrees every 2 seconds. I’m not sure this will make much of a difference, but hey, why not? Oh, and I tested using Cassiopeia again because it’s in a position of the sky where it’s easy to balance the camera on the mount.
Prepare to Be Amazed
Let’s just say I was very surprised by the results. I didn’t touch anything after polar aligning and focusing. I ran the tracker for about two and a half hours and never had to do any adjustments. The stars were drifting, but over the whole imaging session, the stars only moved by about 3 degrees. Whoa! I ended up taking 260 light frames during this session. Add 40 darks and 50 flat (yes, I did them correctly this time) for a total of 350 images. But are they any good?
Out of the 260 light frames, I was able to keep 240 of them for stacking. I reckon that 2/3 of the shots didn’t show any star trails and 1/3 of them showed a few pixels of star trails. I was shocked at how good the tracking was. Again, don’t get too excited, it’s still a finicky rig, but the improvement was remarkable.
When I stacked the photos in Deep Sky Stacker, I set a quality threshold which stripped out another 60 images. But that left me with an hour and a half of total integration time. Groovy! If not for the nearly full moon this evening, it would have been perfect. But hey, I’m just testing.

The Verdict
Balance issues are going to continue to limit my shooting angles, but clearly, the addition of a Lego ball bearing mod to the Lego Star Tracker yielded excellent results. I was surprised at how easy the device was to get set up tonight. These results certainly give me enough motivation to continue to mod this device. I think the next mod will be to print a proper bracket that will let me balance the camera front to back. We’ll see. I’ve got a lot going on at the moment.
But hey, yeah, this was a really good mod that yielded really good results.

