![]()

Call me blessed. Another night of clear skies before the moon rose was the perfect opportunity for me to head outside. I sized up the conditions and as I discussed in my previous post, I felt compelled to take another crack at the Witch Head Nebula using an untracked setup. All I will say at the beginning is that I had much better results with the moon sitting well below the horizon.
Not What I Planned to Post Today
I have a confession to make. It was my intention to post about a little mishap that I had on the back end of imaging the Rosette Nebula. I wrote a rather cheeky and humorous piece that spent a lot of time poking fun at myself. However, with developing current events, I was concerned that my humor might fall very much flat. While I’m sure it would have been fine, I’m going to err on the side of caution. Once again, I find myself a victim of poor timing. I pray for peace, may God keep you.
The Witch Head Nebula Untracked
While the skies were clear, it was rather humid. This meant I’d be dealing with a lot of sky glow light pollution. It was pretty bad, but I was pleasantly surprised when I post-processed my image that light pollution wasn’t horrible to deal with. And speaking of pleasant, the temperature outside was a delightfully comfortable 5 degrees Celcius. I feel qualified to say that having grown up and lived in a much colder climate. Seriously, I put my sandals on for this shoot tonight!
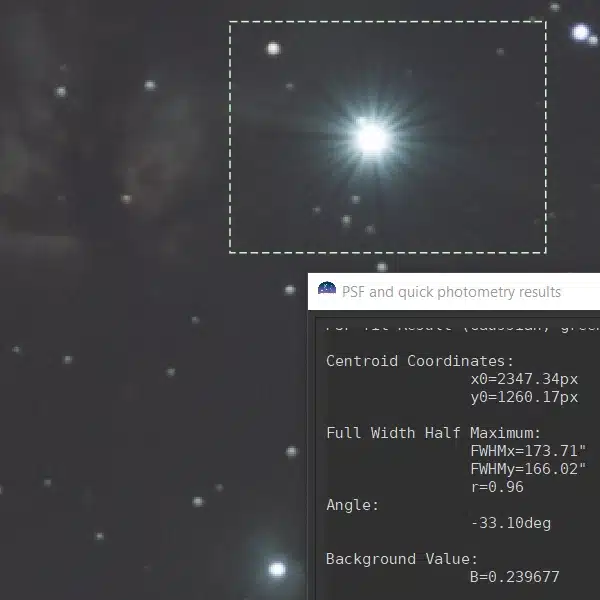
My session was pretty basic and I mostly followed the same script I used when I shot the Rosette Nebula. There were two key differences tonight, however. First, the histogram for my test shots informed me It’d be best to shoot at ISO 3200 tonight. And Second, I tested out a feature on Astro Photography Tool (APT) called Bahtinov Aid. When you’re using a Bahtinov mask, this little piece of wizardry calculates the alignment of the diffraction spikes and tells you if your focus is too near or far. I was able to precisely dial in my focus with this nifty feature. I’ll only note that it’s a little tricky to use when you’re taking untracked photos and I did need to reframe my focusing star a couple of times to get it right.
Tonight I captured 1400 light frames at 1 second each along with 50 dark and 50 flat frames. Yes, I fixed my counting problem… The session went so well that I originally planned to dump the photos on my computer and head back out a second time. However, the humidity really began to dominate later in the night and I figured it’d be best to just get a jump on processing my image.
Post-Processing the Witch Head Nebula
I used the same post-processing workflow that I used with the Rosette Nebula so I won’t go into detail in this post. But something funny did come up while I was working on the image. On my first attempt to set the black level of my picture in GIMP, I observed that I was getting this crazy color gradient in the background. I chalked this up to light pollution and spent no small amount of frustrating time trying to eliminate it. The problem was that it wasn’t light pollution.
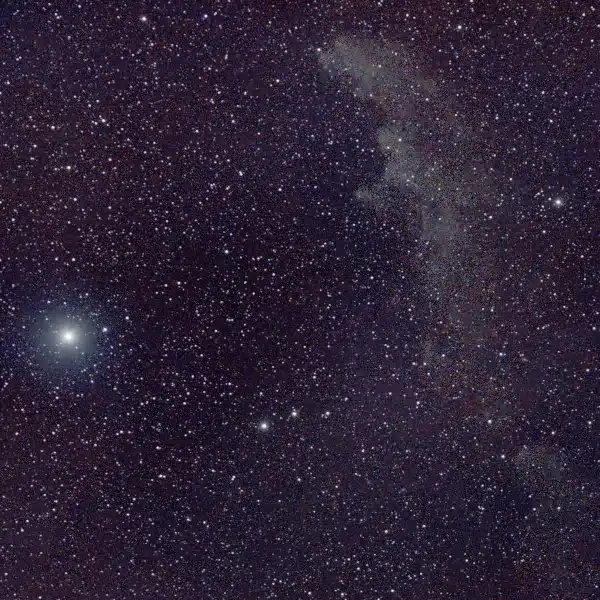
A bit of research alerted me to the fact that the Witch Head Nebula region is surrounded by an enormous gas cloud. So the faint red and purple hues that I was picking up in the photo were really part of my image and not light pollution as I supposed. I’m a bit shocked that this is coming through with my unmodified basic kit. It just goes to show that the Samyang 135mm f/2 lens is a light-gathering monster! The reality is, as I scale down and compress the image to load it below, you probably won’t really be able to see what I’m talking about. But in the full-size image, it’s kind of cool – and I’m definitely going to take a crack at this when I bring the new tracker online and use this lens.
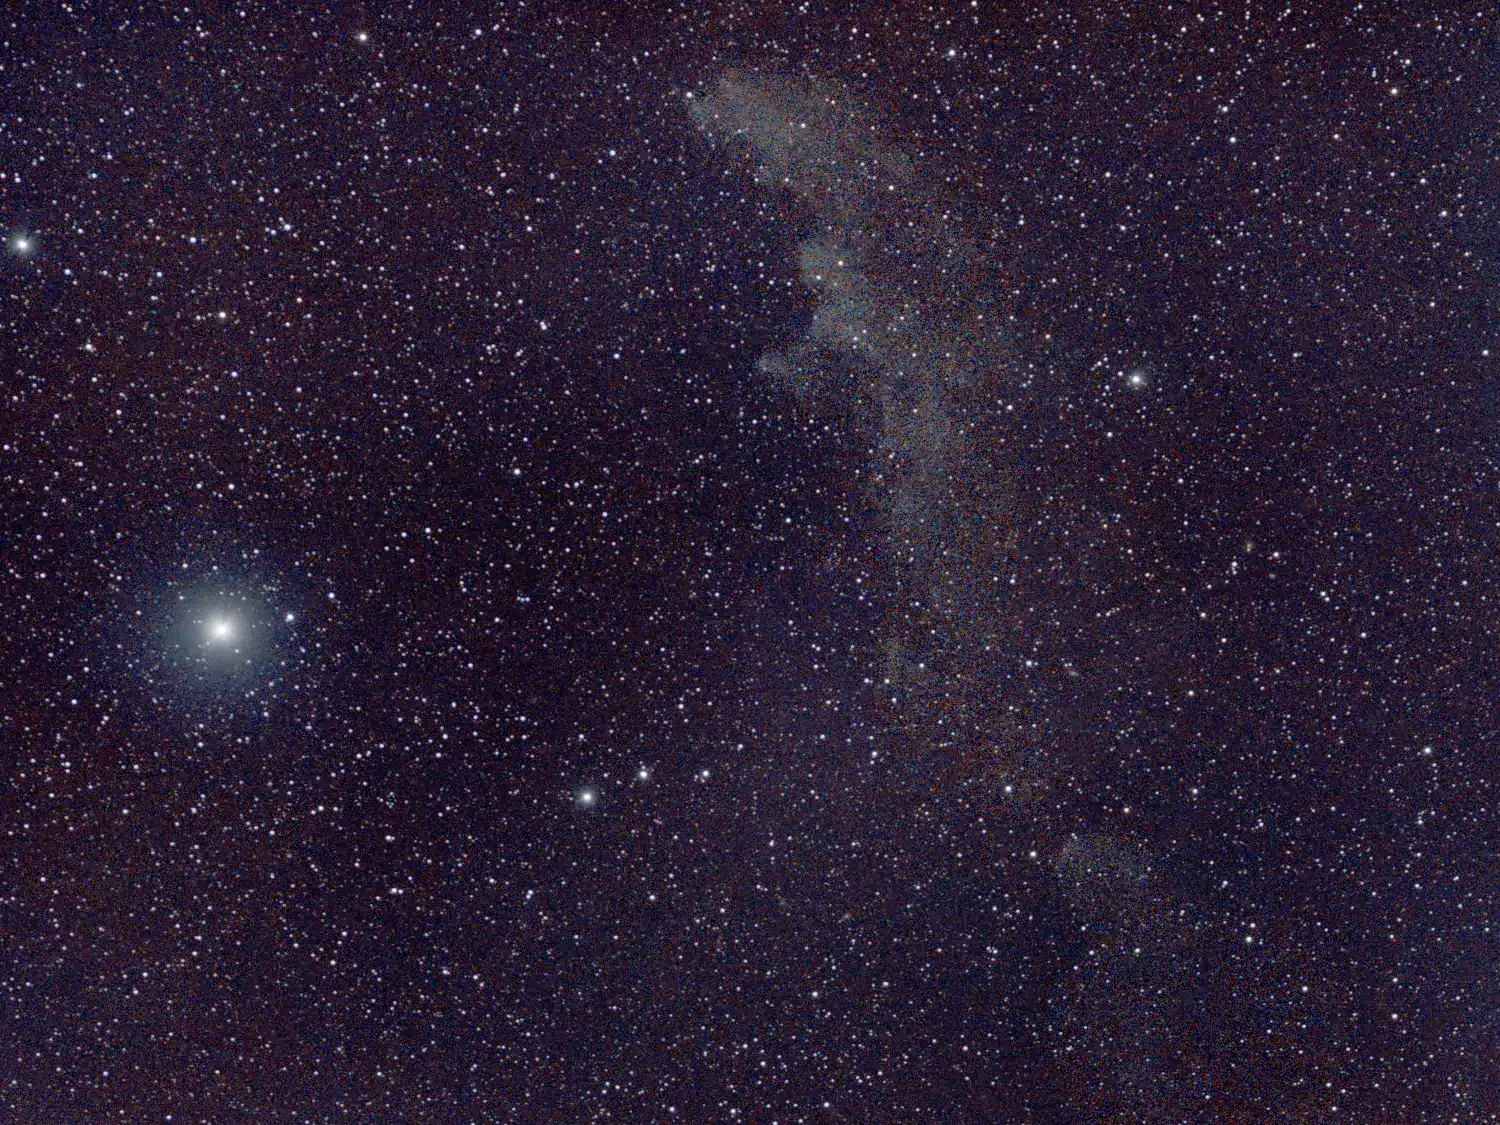
Not bad for only 23 minutes of integration time. This was a bit tricky to post-process and I may play around with this a bit more in the future to hone my skills. But I’m nonetheless happy with how it turned out.
Other Goings-On
I have some updates on the 3D printed star tracker design that I want to talk about but I think I’ll save that for a future post. Basically, I’m working on designing a compact gear train that will give me a little more flexibility and power than the original design that I’m using for inspiration.
And finally, that little mishap I mentioned earlier… I wore out my tripod locking mechanism. I did my best to fix it however at this price level, these things aren’t made to be fixed. So I’m currently doing some research on tripods and I’ll be looking to purchase a new one soon. The big thing I’m focusing on is getting something that I’ll be able to use with an iOptron SkyGuider Pro which is the commercial tracking device I’m leaning towards investing in down the road. That’s still a ways away, but better to plan ahead.
Clear skies are in the forecast this weekend so here’s hoping I can get out for some more imaging sessions!