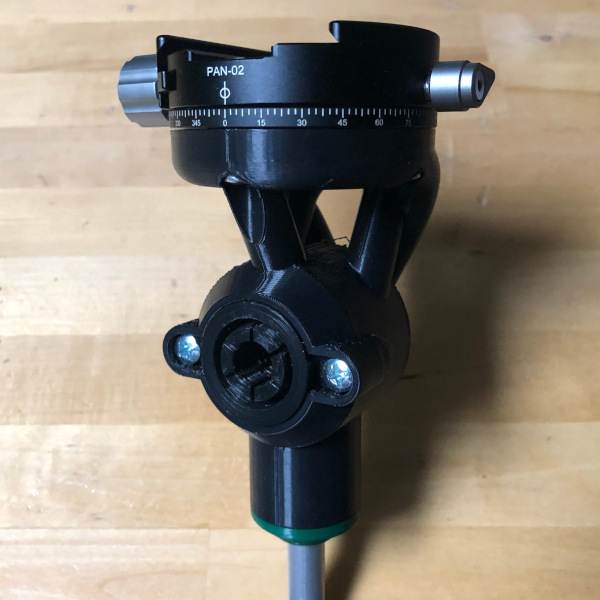
It’s been about three weeks since I’ve had the opportunity to get outside for imaging. That’s par for the course at this time of year and you almost forget what it’s like to set up for a session. But the time indoors is always productive for equipment upgrades and new designs. And that is what I’ve been doing lately in chipping away at Gamma’s final form. I mentioned that I was interested in designing a camera mount upgrade for Gamma and that’s what I’ll overview. I’m tackling two goals here as I’m upgrading the drive shaft also. And the cherry on top is that a solitary clear night is all that I need to test everything out!
Camera Mount Upgrade
The key to the camera mount upgrade is to add more clearance for the camera to rotate around Star Tracker Gamma. One of my takeaways from Rabka-Zdrój was that in certain positions, the camera collides with the tracker which effectively stops the tracking. I think that another 10mm is going to be all that I need to add in terms of clearance which is easy enough to accomplish. I don’t want to go crazy with the clearance height. This is because the farther away the camera is from the center of rotation, the more I need to counterbalance the load.
Another tricky improvement is a 10mm threaded insert that holds the counterweight bar. This allows for easy removal when I travel and stiff performance while I image. And finally, I’ve designed a split ring collar for the drive shaft. This handles locking the camera mount into position. I’ve designed this as a removable element so I can modify this for performance without printing a whole new mount. This also attaches using 4mm threaded insert screws. When a cap screws on the end of the drive shaft, it will wedge the collar tabs tightly onto the drive shaft. This puts the mount in compression along the drive axis which in theory is better for polar alignment. Below is the FreeCAD draft of the camera mount.
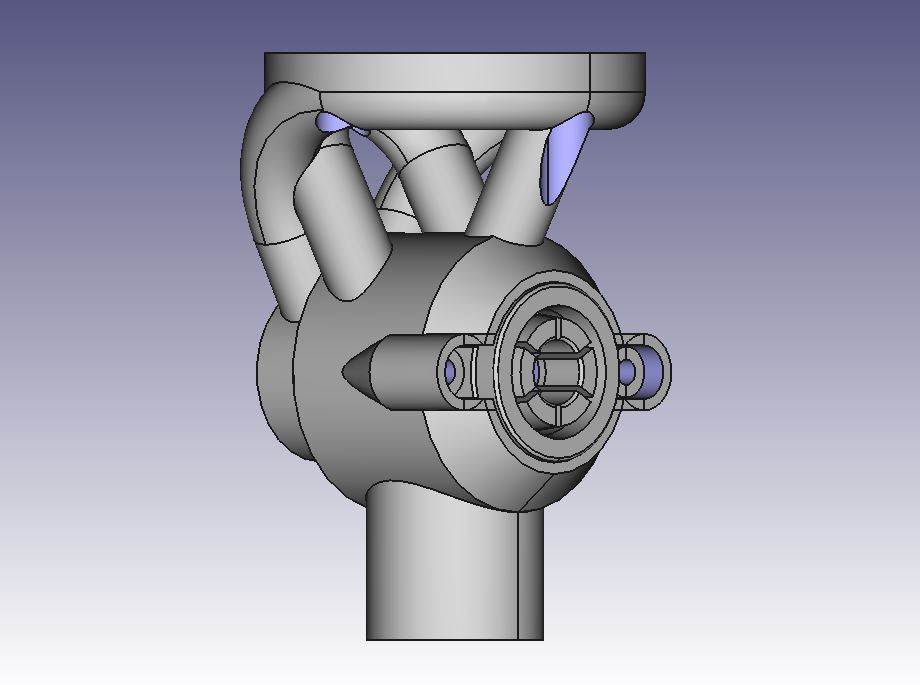
Finally, it’s worth mentioning that I’m loading 2 10mm needle bearings into this mount. This will ensure smooth rotational movement when the camera mount isn’t locked in place.
Drive Shaft Upgrade
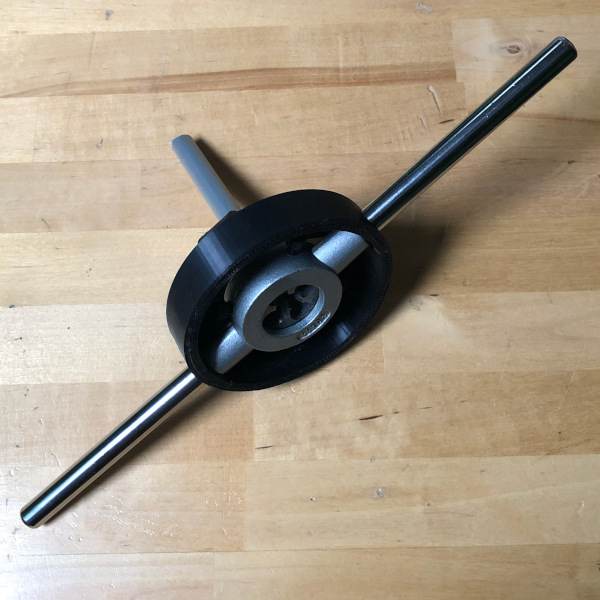
The big idea here is that I’ll thread the end of the drive shaft to allow a cap to screw onto the end and secure the camera mount. Loosening the screw allows the mount to spin freely about the drive shaft. So I went to the hardware store and bought a 10mm die and stock so I could thread the aluminum rod. Well, it turns out to be a little more difficult to keep the thread straight than I thought. Therefore, I went ahead and designed and printed a guide that would hold the rod perpendicular to the die in order to cut a straight thread. I was surprised by how well this ended up working and now I’m cutting perfectly straight threads on my rods. And I have to admit, it’s really, really fun to do.
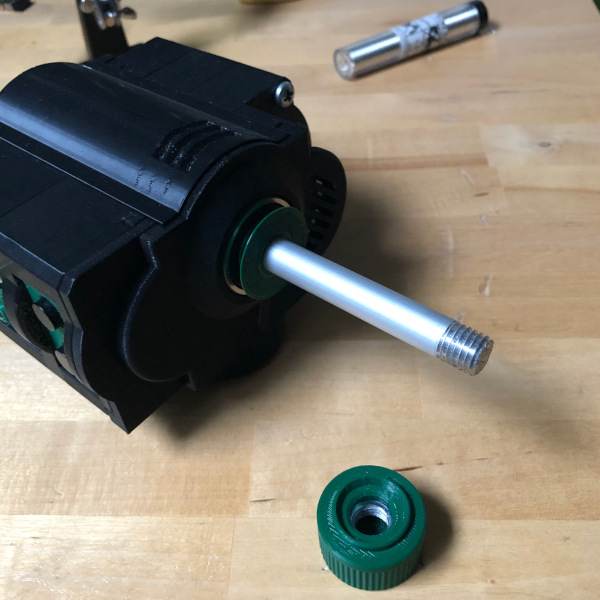
Now the only other thing I needed to do was print and secure a stop on the inside of the forward bearing of the tracker. This prevents the drive shaft from being pulled out of the tracker when tightening the end cap which secures the camera mount. If I was a little smarter and/or knew what I was actually doing, I probably would have opted to use a retaining clip instead. Well, if I feel the need to be overly OCD about this tracker, maybe I’ll go ahead and do that. Besides, it’ll give me some more time using the die which is wicked fun!
Here is a quick look at the drive shaft after assembly.
Hold Your Breath
OK, so this camera mount upgrade looks cool and works in theory – but does it actually work? Well, that’s the big question that needs to be answered right now. And as I mentioned at the top of the article, we just so happened to have one clear night in the forecast. I wanted to stress my setup a little bit but still ensure I’d have something to show for my effort. Therefore, I decided to load up the 50mm lens and shoot 90-second exposures. I wanted to see how accurate my polar alignment is with the new locking strategy and how easy it was to manage this setup during my photoshoot.
The goal was to shoot Cygnus for a couple of hours and then try to get a couple of hours on the Rosette nebula. I would have spent the whole night on the Rosette nebula, but I had to wait for it to rise high enough in the sky to shoot.
Cygnus
I went ahead and balanced everything for shooting Cygnus and got to it. The new locking strategy worked great, but I do have some thoughts on how to make it even better.
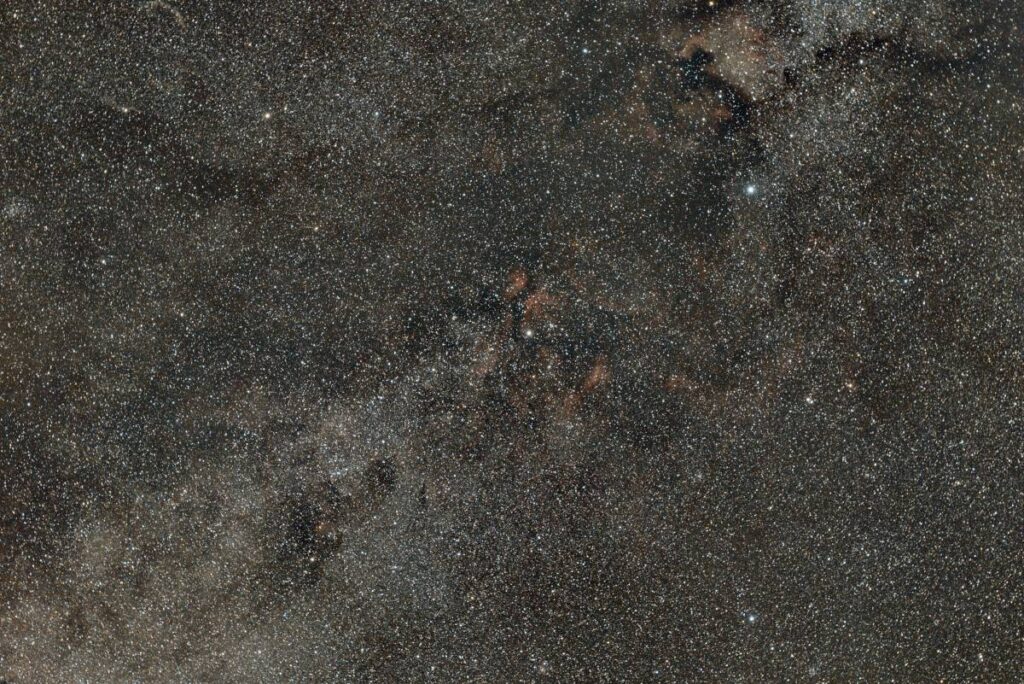
Out of the 60 photos that I took of Cygnus, I ended up keeping 51 for stacking. I think I’m pretty happy with 85%. This is just such a fun part of the sky to photograph with so much going on. I was able to resolve the North American Nebula, Sadr, and the Cygnus Loop faintly. Pretty cool!
Rosette Nebula
The last time I worked the Rosette Nebula was using the Samyang 135mm ED UMC lens without tracking. My image turned out better than I was expecting given the short exposure time. And while I was shooting tonight at 50mm, I was really curious as to how much detail would come through with the 90-second exposures.
So I took 120 photos of the Rosette Nebula with Betelgeuse in the frame. I used the same camera settings so I would only have to take one set of flats and darks for both images. Just like for Cygnus, I ended up keeping 51 photos for stacking. Now, you might be tempted to think that is pretty poor. However, about 45 photos were spoiled by trees and shrubs. And then yes, I screwed up a little bit by not rebalancing the mount when framing my second subject. It was cold outside. Sue me! So I definitely saw some effects in the photos from being poorly balanced.
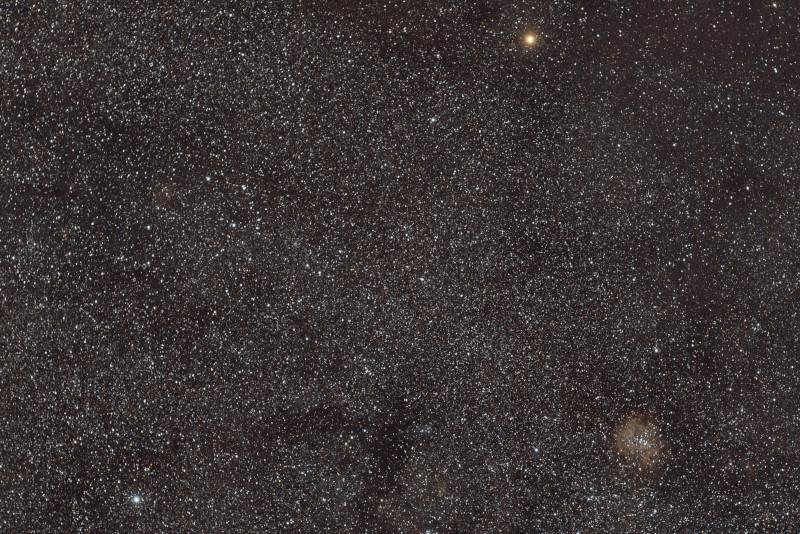
Yeah, I’m definitely happy with how the evening turned out. As usual, the image compression doesn’t do this photo justice. But I’m pretty excited to see what kind of results I can get tracking the Rosette Nebula with the Samyang 135mm later this winter.
Camera Mount Upgrade Evaluation
Couldn’t be more pleased with how everything worked after waiting so long to test these camera mount upgrades. The new solution is easy to use and it works as it should. There are a couple of upgrades though that I’m considering.
- I may make the shaft split ring collar on the mount a little smaller. I think having thinner tabs will result in a little better performance when locking the mount in place. It works fine for the 50mm lens, but I think the weight of the Samyang 135mm lens might not hold as well. We’ll see.
- I think my OCD is taking over and I’ll probably redo the drive shaft with retaining clips. I can position this at the rear of either or both of the shaft bearings. This way, I’m guaranteed to have everything locked into a stable position without the fear of pulling the shaft out. I don’t have a lot of clearance with the parts inside Gamma (~1mm on the shaft gear), so this peace of mind would be very welcome.
Not a bad night at all and I was glad I could get out. While it isn’t looking good in the immediate future, I’m hoping this will clear up a little in December so I can start putting more time on all the winter skies have to offer.
