All my best-laid plans for this winter have thus far been held hostage by the weather. Over the past month, I’ve managed a whopping 4 hours of imaging. Talk about the winter weather blues! And the saddest part is that the days are starting to get longer again. Well, I suppose I can just sit here feeling sorry for myself or do something about it. Actually, the truth is that I’ve been quite busy even though I haven’t been imaging much. So while I stare out my window upon 20cm of freshly fallen snow, I thought I’d catch you up on a few small things I’ve been working on to stay busy.
Did I Ruin My Camera and Lens?
Everything that could have gone wrong in my last post, went wrong. I realized though, that I finished that post by sharing how I took it upon myself to properly clean my lenses and camera sensor. Talk about a nerve-racking cliffhanger! This delicate work required patience and a steady hand. Those happen to be two qualities that I have never been accused of having. So, did I do the job right or did I just brick my astrophotography gear?
Well, despite my winter weather blues, I was able to get out quickly one night to play a little – dodge the clouds. Certainly not ideal weather to seriously image, but decent enough to test how well I cleaned my gear. I managed to squeeze in a couple of hours under less-than-ideal conditions to see if my gear still imaged well. And I’m happy to report that everything looks spiffy. Below, you’ll see a flat-frame image and a short run of the California Nebula.
 | 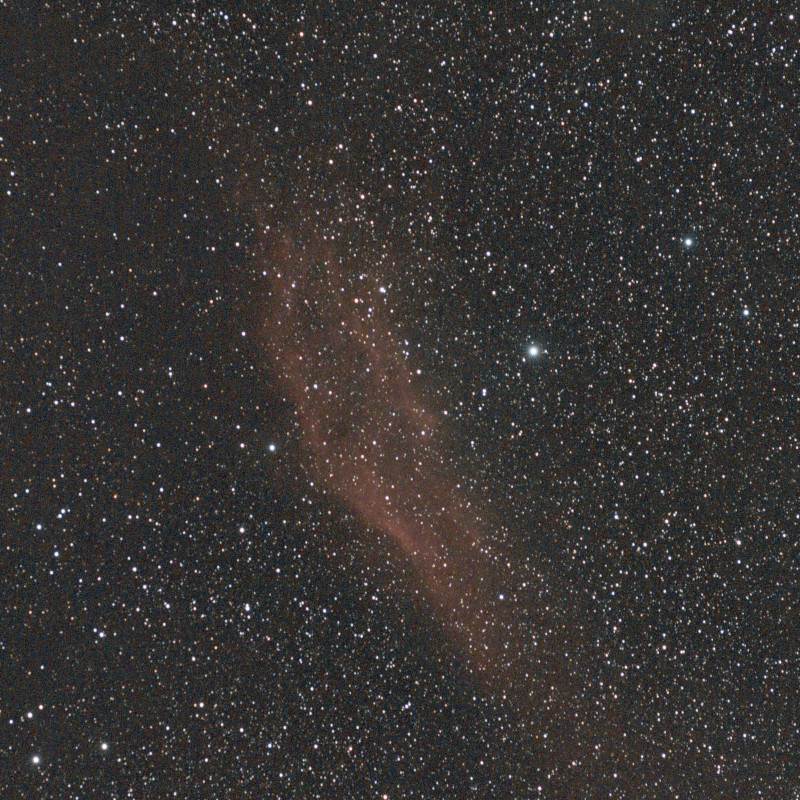 |
| Stretched Flat After Sensor and Lens Cleaning | California Nebula – 87@30s Test Stack |
Yeah, I’ll take that! However, everything during the night didn’t go without a hitch. Gamma was acting a little cranky. And it wasn’t too difficult to figure out what was going on. Time for some more Gamma upgrades.
Gamma Upgrades
Looking at the weather reports, I knew I had more than enough time to work on some significant upgrades to Gamma. So I just got to it. I had two primary objectives for Gamma upgrades. First, I noticed that when I engage the taper lock in front of the mount, it starts to pull the shaft out of the tracker. Now I knew this was going to happen. I just underestimated how much force was actually being applied. So, I want to fix that with a new shaft solution. Second, the efficiency of the taper lock left little to be desired. That means I get to redesign a new taper lock plate for the camera mount.
Gamma Drive Shaft Upgrade
I talked before about adding some retaining clips to the drive shaft to handle the axial force of taper lock solution. And so I set out to accomplish this. Basically, I want to add 2 retaining clips to the shaft. One at the very end of the shaft in the rear, and one right behind the forward shaft bearing. This should allow me to tighten the taper lock without totally ripping the shaft right out of the tracker.

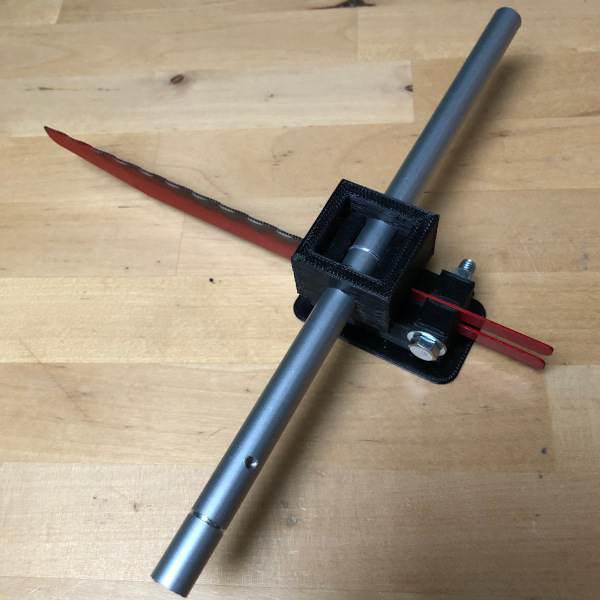
Only one problem, I need to cut straight grooves on the shaft to lock the retaining rings in place. As I don’t own a lathe, this is going to be tricky. But after thinking about it for a while, I decided to build a tool to cut the grooves. Basically, I’ve mounted a 1mm wide metal blade into a holder that allows me to cut a 0.5 mm-ish deep groove on my shaft. I just have to squeeze the tool together and rotate the shaft. After a few minutes, I’m left with a perfectly cut groove that takes the retaining clips perfectly.
Well, it was almost perfect. After assembling the new shaft and tightening everything up, it apparently worked a little too well. I neglected to remember how flexible plastic can be and found that if I tighten the taper lock too much, it flexes the housing which pulls the shaft gear into the corner of my Nano 33 BLE Sense chip. It’s not enough to damage any of the parts, but it’s definitely enough to ruin every photo I might try to take. Easy fix, shorten the gear by 1mm and upgrade the taper lock to be more efficient. Below you can see what the retaining clip looks like on the shaft and the rear image of the Gamma shaft once loaded.
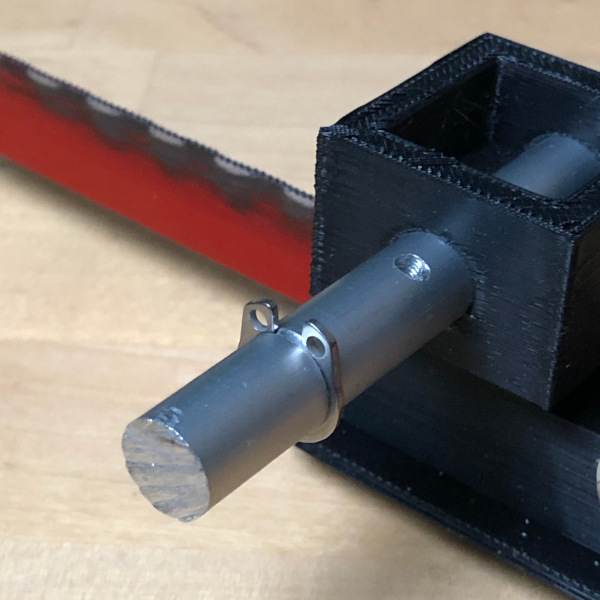 | 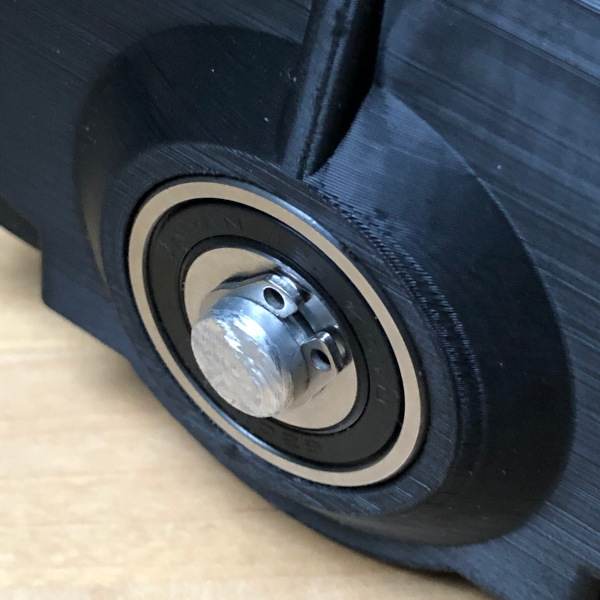 |
| Image of Retaining Clip Set in Groove | Image of Retaining Clip Set on Gamma Drive Shaft |
Gamma Mount Taper Lock
Humble brag alert – I’m a genius. I built the camera mount with a removable taper lock. My thinking at the time was that if one of the tabs breaks off I can reprint that one little piece instead of reprinting the whole mount head. But here as it turns out, the original taper lock just wasn’t that efficient. So HA! I can just design a new one without reprinting the whole mount head.
I decided to reduce the width of the taper lock from 3mm at the tip to 1mm at the tip. I’m going to take advantage of the flexibility of the plastic to make locking the head in place a little easier. Next, I’ll update the locking cap to have a wider rim with no tapered angle. This way the force of the cap is pushing down towards the shaft when sliding over the taper and not up into the housing. Really straightforward to design and print. And it came out perfect. Much easier to tighten everything down and I don’t need to worry about things sliding around anymore.
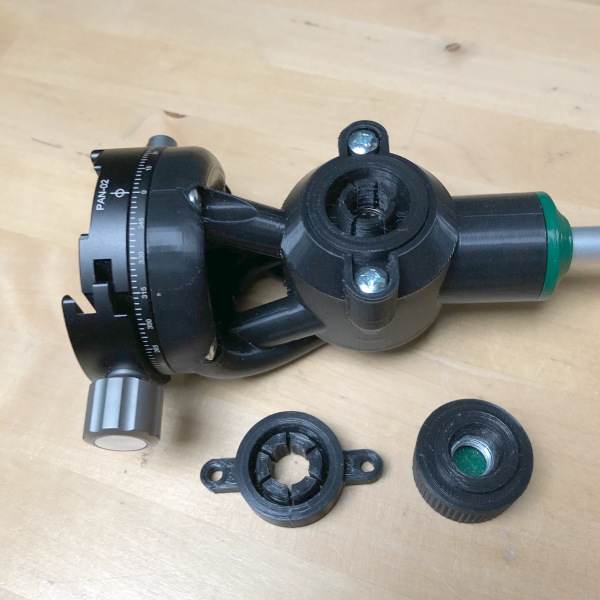 | 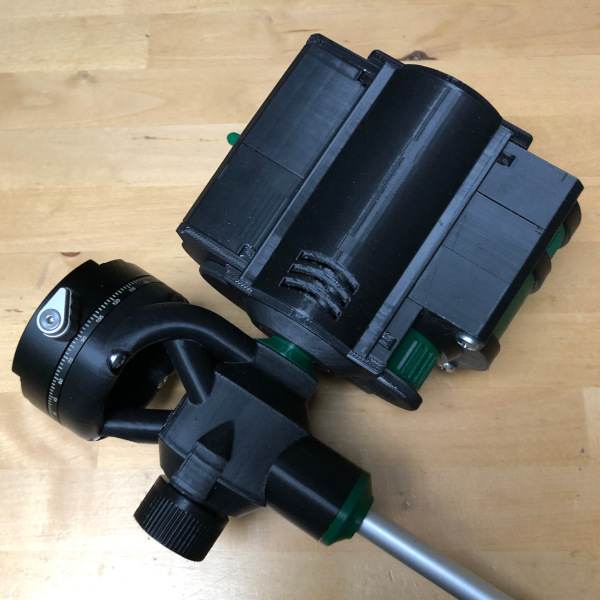 |
| New Taper Lock (in Mount), Old Taper Lock (bot left), and New End Cap (bot right) | New Taper Lock and End Cap Loaded onto Gamma |
Gamma Final Notes
My winter weather blues don’t show any sign of abating and I lament that I haven’t been able to get outside to test these upgrades yet. But I’m certain that they will work, it’s just a question of how well. This leads me to my final review of Gamma. Gamma totally rocks. It’s sturdy and reliable and I’m having a blast using it. But these will be my final upgrades for this design. I’m ready to move on. And with what I’ve learned with Gamma, I know I can do even better.
On the Horizon
I confess I’m procrastinating. My Samyang focuser is about 90% complete and I’m struggling to find the will and the time to finish it. Part of the reason is I’m still debating whether to internally or externally power the focuser. I’m leaning toward internal power, but that’s why things have been slow. Well, that and I’ve been sucked down a rabbit hole with another challenge…
I think Gamma is the bomb, but with 50-something-odd printed parts, it’s not sharable or reproducible. So I’m currently reviewing all the parts of Gamma and trying to figure out where I can cut down on complexity. The obvious place to start is with the drive train. At 45-plus component pieces alone, I don’t know if it was luck or skill that allows it to work as well as it does. But I’ll be honest, I’m not sure I could reproduce that success even if I was forced to. Which is why I’m slow-walking all the finer details on the blog.
New Drive Train
Right now I’m diving headfirst into the deep rabbit hole of gear design. I believe that I can develop a more compact and better-performing gear train with a higher reduction with about 1/3 of the parts. Sounds ambitious, I know. What I decided I needed to do was properly learn as much basic design theory about gears as I can. And that takes time. It’s not too difficult to get on top of, but then translating that design into working 3d prints is where the voodoo magic lays.
I’m looking at epicycloid and hypocycloid gear solutions. I’m dozens of hours of prints into test gears and I’m making progress, but I haven’t figured it all out yet. I think I’m close, but we’ll just have to wait and see. I will say at this point though that I’m happier with the epicycloid progress. One of the key reasons here is that I want to stick with the 28BYJ-48 5V stepper motors. I’m cheap, remember? If I was willing to drop a lot more coin on a better motor, I’d be moving in a completely different direction with my design.
Anyway, hopefully, soon I’ll be able to shed my winter weather blues and get back outside to do some proper imaging. I’m starting to get a little nervous that I’m going to miss Orion this year. That’d be a shame because I was so excited to get after it this winter. But we’ll just let the cake bake and see what the future holds.
