Exciting Changes Ahead
The results from my first tracking session were very encouraging. Of course, the results are far from where I want them to be or even need them to be. But despite the images, I learned that the tracker did something. And something is always better than nothing. So it’s time to drive forward with Version 4 of the Lego Star Tracker.
I have no illusions that this is going to be a high-performance piece of precision equipment. But it’s really neat to think about something, build it, and have it work … kind of. And besides, everything I’m learning right now and in the future with this project is teaching me basic principles that will be extremely useful when I am finally ready and can afford to purchase a commercial tracker.
Time to get cracking on the big reconstruction!
Version 4 Tracker Priorities
There’s a lot of work to do but whenever you make major changes to something, you always run the risk of fixing some issues, but inadvertently creating a plethora of other issues. The danger here is you can lose track of which issues you fixed vs which new issues you created. So to be honest, I’m pretty nervous about taking the current device apart to execute such significant changes.
Here are my priorities for the next version based on what I learned testing Version 3 of the Lego Star Tracker.
- Redesign the load arm to take out even more flex
- Gear down to 5760:1 so each rotation at the input correlates to 15 seconds or 0.0625 degrees
- Each 24 degrees at the input = 1 second or 0.0042 degrees
- Test across different movement time intervals
- Flip the wheels that the platform is resting on inside out
- Build a brick base for more stability
- Add a dumb sight of 2×1 1 hole technic bricks.
Time to Get Building
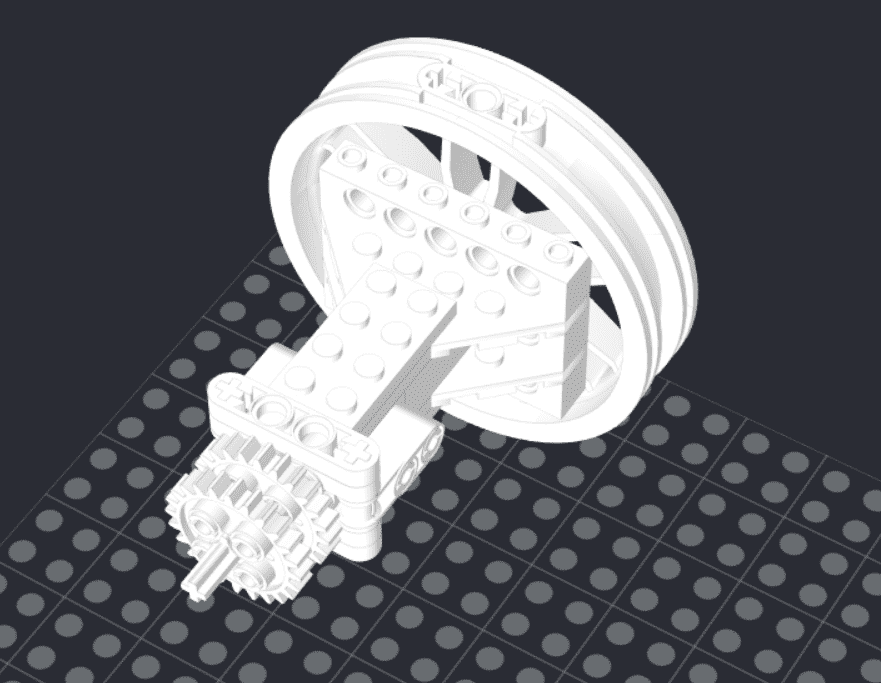
The big issue I have with the current load arm is that the rotational force is still transferred primarily through on Lego axle. It’s significantly better now than when I started, but it’s not stiff enough yet. So I decided to secure the 24 tooth gear directly into the brick axle using Lego pins through its four holes. Here is Studio diagram which shows the new load arm.

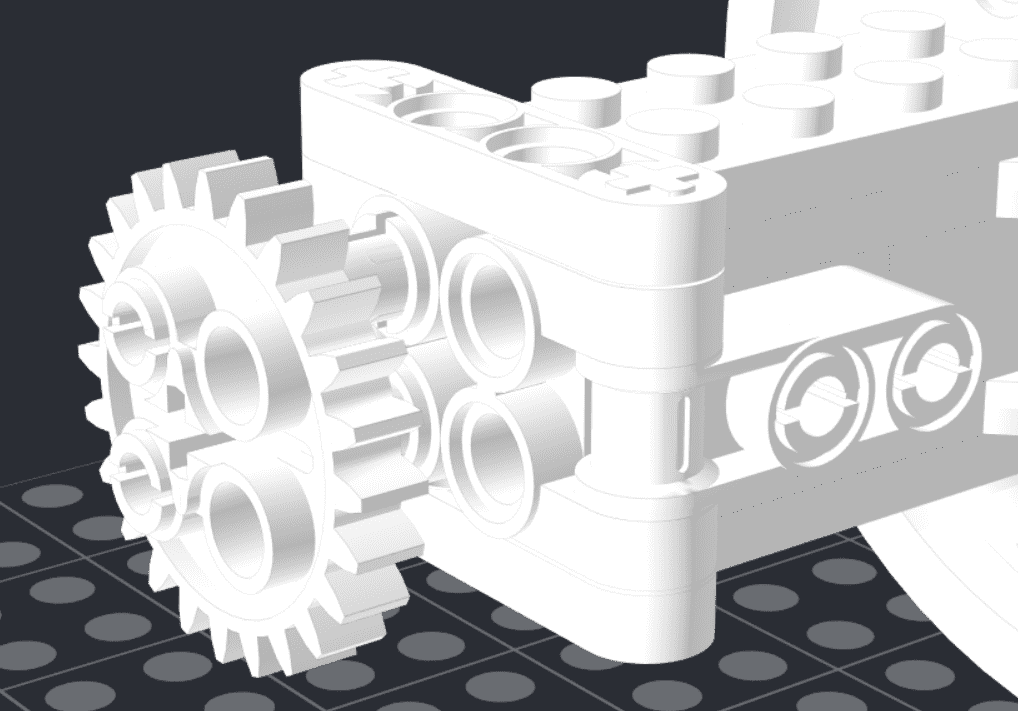
It’s a little hard to see what I actually did here, but here is a closeup of the connection.

Now the rotational force is transferred through 4 pin pieces instead of through 1 axle. I was able to test this in the old design before I started working on the gears and confirmed that it’s as solid as it’s going to get for now. Very little flex and in fact, when overloaded, it slipped at the worm gear instead of axle connection.
You might also notice that I’ve added a second 24 tooth gear. This leaves the connection of both gears slightly offset from the worm gear but my hope is that it will help take up a little more slop in the system. It could of course backfire and lead to all kinds of slippage issues. We’ll have to wait and see.
Lego Star Tracker Version 4 Gear Train
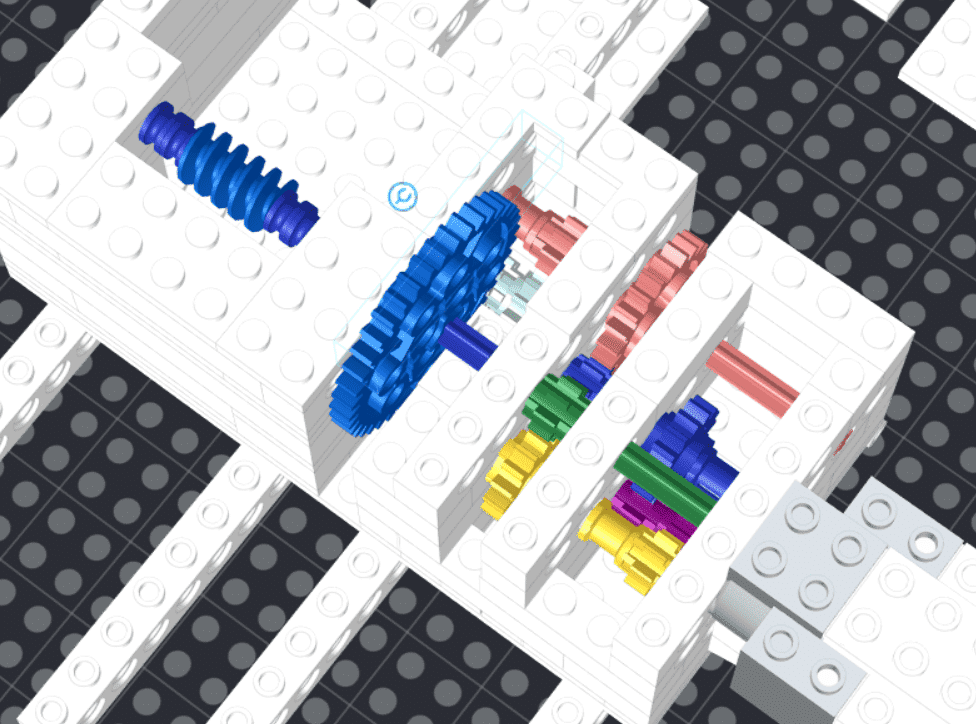
On to the gears! To get a gear-down ratio of 5760:1, I need to add 2 more stages of 2:1 reductions using 8 tooth and 16 tooth gears. It’s getting a little crowded in there and I want to keep things as compact as possible so I need to redesign the whole thing. Here’s the diagram of the new gear train.

Green to Yellow 8 to 16 2:1
Yellow to Purple 8 to 16 2:1
Purple to Dk Blue 8 to 16 2:1
Dk Blue to Rose 8 to 24 3:1
Rose to Aqua 8 to 16 2:1
Aqua to Blue 8 to 40 5:1
Blue to 24 Load 1 to 24 24:1
24 x 5 x 2 x 3 x 2 x 2 x 2 = 5760
Next, I built a base using a 16 x 16 plate and just connected everything up at the same ratios as the lift arms. I also tacked a dumb sight on the top of the device by stacking 1 x 2 Technic hole bricks in a row. Finally, I flipped the tires inside out as the inside surface of the tires is relatively smooth and should eliminate any jittering due to the outside tread pattern.
I think I’m all set! I tested it a bit inside and I have to say I’m a little worried about the new gear train. It just looks like it’s going way too slow. I double-checked everything and just reminded myself to trust the numbers. We’ll know soon enough.
Now just need to wait for another window of opportunity to take some pictures!
