![]()


Over Improvement
I suppose I got a little too ahead of myself after the first test of the sixth version of the Lego Star Tracker yielded such solid and consistent results. I had a list of small tweaks that I wanted to make and I completed those and added a few more along the way. So imagine my surprise as the second night of shooting with this version ended up being dreadful. I couldn’t figure out at the time what was going on. But upon further review, I was able to piece it together and the good news is I know what to do – I need to start fixing the fixes.
What Changed?
So I ended up changing quite a bit more than I initially expected. I added bands to all six pulley wheels, added a top gear to help stabilize the back end of the load arm, added a collar to the load arm to improve the stiffness, and last but certainly not least, I created an entirely new base.
I was really expecting to have close to perfect results.
So What Happened?
OK, stop me if you’ve heard this before… Polar alignment. Yeah, that has kind of become my Achilles heel whenever I set out to track. It ended up taking me a real long time to get everything polar aligned and even then it didn’t seem quite right. Pretty frustrating but after about 40 minutes, I got it dialed in good enough to get shooting.
My shots, however, were far from good. But it was a much different result than anything that I had seen before. The stars weren’t drifting photo to photo but there were star trails in just about every photo. I really couldn’t figure out what was going on.

At first, I thought the Boost motor was misaligned, so I checked to make sure everything was connected tightly. Next, I tweaked the counterbalance a little bit to make sure there wasn’t anything wonky going on there. Then I changed the frequency of the rotation to see if that had an impact. And finally, I went back to trying to swizzle the polar alignment a bit.
I was only getting about 1 in 10 good photos, and it wasn’t consistent. If my polar alignment was off, then all the photos would be bad. So it had to be something introduced in my system. And the best bet was that something I changed recently was responsible. Hence I’m going to focus on backing out of my changes or rather fixing my fixes.
Process of Elimination
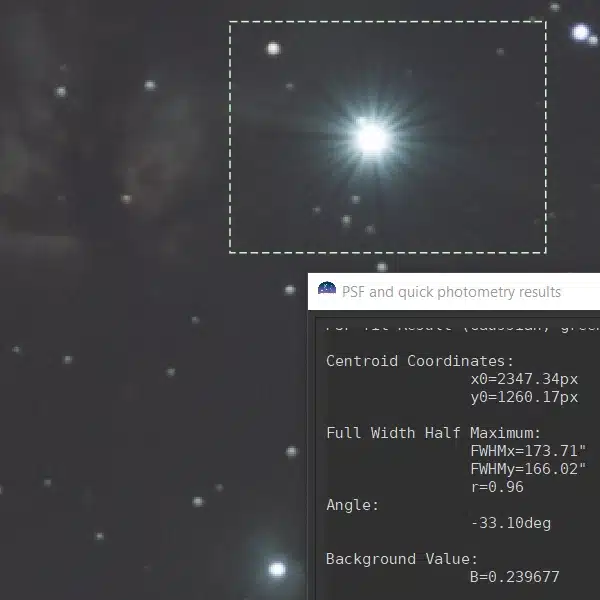
I looked through all of the photos that I took throughout the night once I came back inside – just North of 100 photos. The trails and distortions all looked pretty consistent but there were anomalies that yielded clues. There seemed to be some vibrational component to the trails. If I had thought about this a little longer, I probably would have come to what I believe the problem was right then. But I moved on and started inspecting the rig.
The Base
What about the base? Well, the whole point of redesigning the base was to firm up the balance issues I was having. I looked it over real good and determined that it’s really sturdy now. While I can’t totally cross it off the list, I’m pretty confident this base was a huge improvement over the previous base design.
The Pulley Bands
What about the pulley bands? Well, here is where I think part of the problem lies. You see, there is about 1mm of difference in the diameter of the different load arm components that I’m using. That may not seem like a lot, but I did notice before heading out that this effectively angled the load arm up a tiny bit when loaded into the cradle. I had assumed that the weight of the load arm would have pulled it down into alignment, but maybe not. Although, it certainly wouldn’t help when trying to polar align.
Top Stabilizing Gear
What about the top gear? I don’t believe this had anything to do with the rig’s performance, but I also believe it doesn’t add any value to the design. So basically, it’s unnecessary. Well, this is one of the fixes that make for easy fixing.
Load Arm Collar
What about the collar? Last, but certainly not least… I added a circular collar to just give the load arm a tiny bit more support. When I put the load arm together, I was satisfied that there would be enough clearance between the collar studs and the worm gear as not to impede the rotation of the load arm. Well, that turned out to be incorrect…
I could tell when inspecting the load arm in the cradle with plenty of light, the studs on the collar were absolutely making contact with the worm gear. If I was a cartoon character, a light bulb would have just flashed over my head. This kind of explains everything I was seeing in the photos… This is definitely one of the new fixes that need fixing.
I was perplexed how the stars in the photos weren’t really drifting, but star trails and distortions were appearing in all the photos. The alignment was good enough (for me at least), but when the studs made contact with the worm gear, they were pulled up a fraction of an inch ahead of the spur gear. The contact was so minimal, that the stud would slip off the worm gear which would fall to the spur gear location which is where it was supposed to be all along. So the photos were capturing the pull up which formed star trails but once the studs slid off the worm gear it would return to its correct position which didn’t appear to drift.
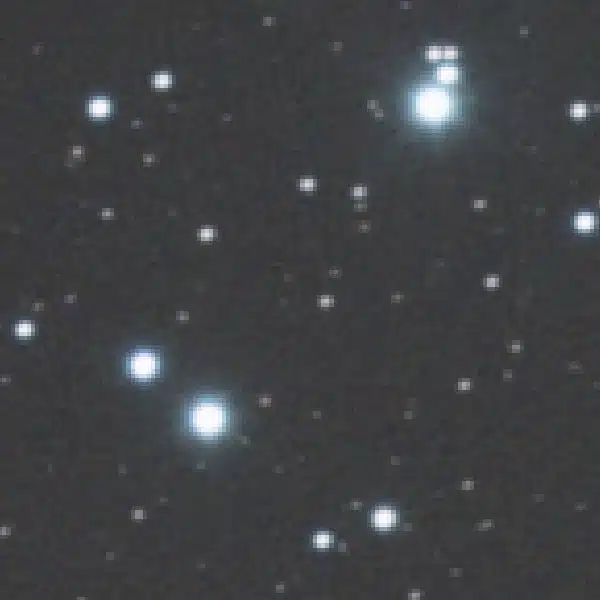
To show you it wasn’t all bad, here is a photo where the rotation of the load arm never made contact with the collar studs. Same region and conditions – what a difference!

Fixing the Fixes
I’m not claiming victory yet, but I know what I need to do.
First, I’ve pulled the bands off of the rear pulley wheels and left them on the front pulley wheels. I’ve confirmed it sits level again in the cradle. Second, I’ve scrapped the top gear as it was unnecessary. And finally, I’ve removed the collar from the load arm.
I’m now ready to test the rig again. Hopefully, I won’t have to wait another 3 weeks to get a break in the clouds again. But we’ll have to just wait and see.
I have a little more to say about my polar alignment trials, but I’ll save that for the next post.