![]()


Can you believe it? It just might happen that there will be a break in the weather over the next two days! I’m trying not to get my hopes up too much, but I am preparing for the possibility. If things break the right way, I might be able to continue testing the Lego Star Tracker and the Bahtinov mask from my previous post. But looking my equipment over, I’ve noticed that the plywood platform I’ve been using to level the Lego Star Tracker has badly warped. It was the perfect opportunity to print a new leveling platform for the Lego Star Tracker.
Printing a Leveling Platform
Immediately it became apparent that anything I design to print will be too big for a single print run. So I knew I was going to have to print multiple parts and piece them together after the fact. I also decided to go for a 3 point platform against the 4 point platform that I was previously using. This would make it a little bit easier to dial the leveling in at the expense of a little bit of lateral stability. I think I’m ok with that.
I built everything, one piece at a time, in FreeCAD with a rough idea of how I wanted the design to look. Then I set out designing each individual piece. There are two corner brackets in the front which attach to each other, one bracket in the back, and then two beams for connecting the brackets. Below is an example of the left corner bracket of the leveling platform in FreeCad

The basic idea is that I’ll feed long bolts through a t-nut that is countersunk on each of the brackets. Leveling is achieved by turning the bolts that raise or lower the platform. I can use a digital bubble level on my phone to test when the platform is level. The assembled platform is shown below.
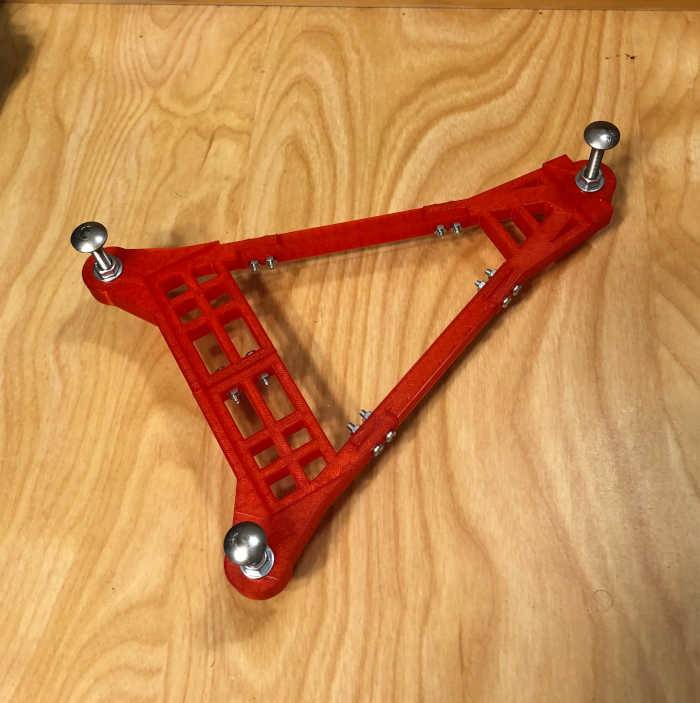
You can see the detail of the countersunk t-nut in the next image followed by a picture of the Lego Star Tracker mounted on the platform.
 |  |
Project Outcome
I can’t say for sure that I’m going to stick with this design in the long run, but it’s enough for me to get out in the coming days. I’m satisfied that it’s stable enough to support the Lego Star Tracker as long as I keep it relatively balanced.
At least with plastic, I won’t have to worry about the pieces warping as the plywood did. I’m also not terribly concerned at this point about heat as the weather doesn’t get overly hot here in Poland. This is sometimes a concern with the PLA plastic that I’m printing with. At any rate, this was a fun little project to build.
Keep your fingers crossed for clear skies in the coming days!

