![]()


A break in the clouds plus a balmy 5 degrees equals a really awesome evening taking photos. Even better considering this is the first opportunity that I have to mount the Samyang 135mm f/2 ED UMC lens on my 3D-printed star tracker. I didn’t really plan anything special other than to put this gear configuration through its paces and see how it performs. This is all about learning. And I have to say I’m pretty pleased with my first tracking session results with the Samyang lens. This after all was the goal of my DIY star tracker projects. And now I can say that I’ve finally arrived.
Preparing to Image
In preparation for my first tracked imaging session with the Samyang 135mm f/2, I decided that I wanted to really push the lens to gather as much light as possible. The only problem is that I am shooting from a Bortle 6 zone. That means light pollution is going to be a real noisy problem. So I went over to the website Photons to Photos to do some investigation.

The first thing I want to check is the input-referred read noise. This chart shows the noise generated by the camera electronics when converting the sensor data from analog to digital as a function of the camera’s ISO setting. The lower the noise, the better and as you can see, the higher the ISO setting, the lower the noise. So you’d be tempted to say, hey, let’s go ahead and shoot with as high an ISO as possible to minimize the read noise. Well, not so fast. The lower read noise comes at the expense of dynamic range – or the ability to differentiate between the blackest blacks to the whitest whites. A larger dynamic range is preferable here.

So clicking over to the photographic dynamic range chart, I can view my camera sensor’s performance as a function of ISO. And what you find here is that the lower the camera ISO, the higher the dynamic range. Now, thinking in terms of astrophotography, what we observe is a dark void background littered with bright starry objects – ie. a lot of contrast. So a higher dynamic range will yield better details in my photos. But clearly, there is a tradeoff. If I want maximum dynamic range, I’m going to have to live with higher read noise and vice versa.
So that leaves me with a choice to make. Since I’m tracking and taking a more prolonged exposure, I’m going to need to image with a lower ISO or else I’ll blow my image out in these light pollution conditions. When I look at both of these charts I can see there isn’t much of a difference in noise between ISO 800 and ISO 400. But there is a 12% improvement in the photographic dynamic range. So this makes my choice easy. ISO 400 it is!
Setting Up Outside
I’m pretty sure I’m going to stick with 30-second exposures tonight. Given the weight of this particular lens, I’m counting on there being problems. I’m going to open the lens up to f/2.8 to capture as much light as possible. Therefore, 30-second exposures give me the best chance at success tonight. Eventually, I found that the image was maybe just slightly underexposed with these settings but it wasn’t that much of a problem.
So I went about leveling up my tripod and ball head mount. Then it was time to add the tracker and mount the Samyang 135mm f/2 lens. All is good so far. Now I turned to SharpCap for my polar alignment. And that’s when things went a bit sideways. I just spent the last ten minutes getting everything level and set up and then I bumped my tripod. Crap. I had a decision to make and I just decided to accept I might be a little off level. I didn’t want to lose any more imaging time tonight. Let’s hope it won’t through things too far off!
My polar alignment was showing as poor, but I suppose it’ll just have to do. Worst case scenario, I have a built-in excuse if things don’t turn out well.
Target Selection and Imaging Plan
Well, the moon wasn’t up yet and Ursa Major was directly overhead. Let’s steer back towards the Pinwheel galaxy again which will give us a good comparison to my previous sessions. The imaging plan tonight for my first tracking session with the Samyang 135mm f/2 is going to be 240 lights at 30 seconds each, 20 darks, and 30 flat frames. Everything went brilliantly.
The only thing I’ll note about the session is that I decided to shoot my flats in manual mode tonight. I dimmed my tablet (white light source) as low as it would go and stacked 4 sheets of computer paper between that and my lens. I then set the exposure time until the histogram on the camera showed the RGB channels were all positioned between 50% and 75%. While this looks overexposed via the histogram, this is right where I want to be for the flat. This ended up being about a 2-second exposure. And as you’ll see below, a histogram stretch of my flat frame shows pretty good results!

Lessons Learned
Clearly, this is the most ambitious that I’ve been with the 3D-printed star tracker to date. So what takeaways do I have from this first tracking session with the Samyang 135mm f/2? Plenty!
The Samyang 135mm f/2 lens is a beast that weighs in at 830g. That requires a pretty significant counterweight to keep things balanced. I learned 2 things here. First, the M8 rod that I’m using as a counterweight rod gets really wobbly when the counterbalance is placed too low on the rod. In real terms, that means if a mouse farts within 5 feet of your rig, you’re going to see the oscillation in your photos. I’ll fix this by using 10mm aluminum tubing in the next version of the tracker. The second thing I learned is that I need to beef up my counterweight. To balance the Samyang lens, I had to move the counterweight way down the rod and this just isn’t ideal. Best to have more weight closer to the axis of rotation than less weight further away. Easy to fix – more steel washers in my future!
The next thing I learned is that my gears were printed way too rough to reliably shoot at 135mm (or greater in the future). This is a real problem. But it’s also a problem that has a relatively easy solution. In the next iteration of the star tracker, I’ll sand the gears down after they are printed. I’ll probably start with 120 grit and work up from there until everything is glassy smooth. This is going to be tedious, but I know it will be worth it in the long run. I ran a sample test with a gear pair so I know this will work.
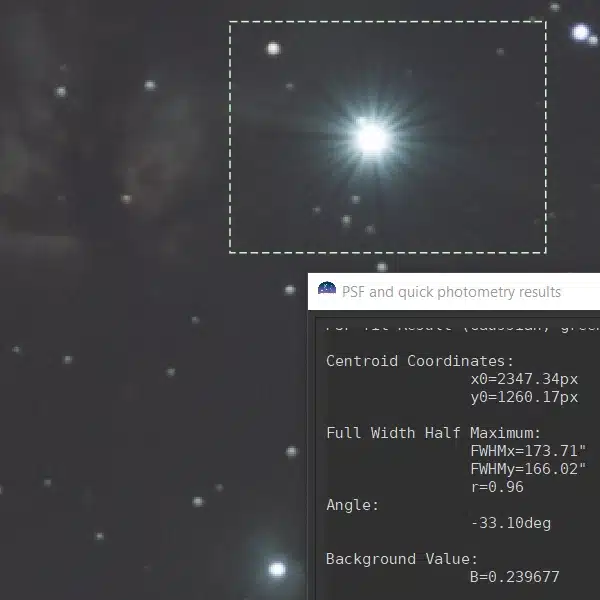
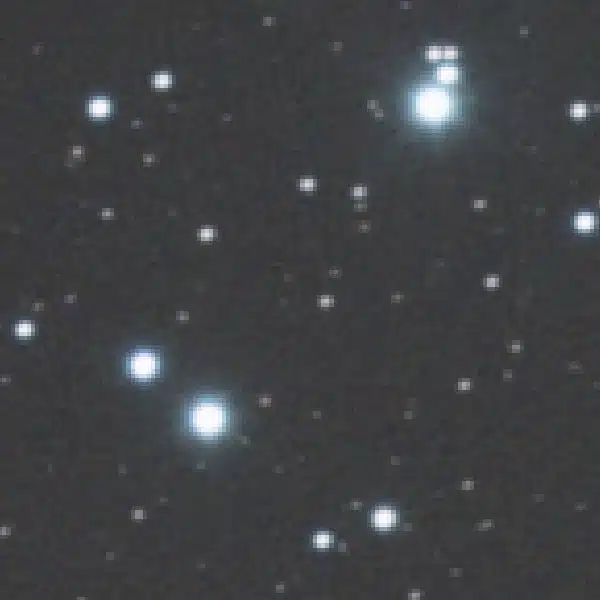
Samyang 135mm First Tracking Session Result
I took some time to review all of the photos and out of 240 images, I kept 74 for stacking. That’s a horrible ratio, I know. But since I know the reasons, I know it is only going to get better from here on out. Besides, a 37-minute integration for the first tracking session with this lens isn’t too shabby.
Nothing crazy with my processing this time. I fired up Siril and ran my scripts to stack the images. Then a quick background extraction, color balance, and green noise reduction. Finally, I took the image into GIMP for a quick stretch and a smidgen of gradient work to squash the light pollution. Without further ado, here is the result with Alkaid and the Pinwheel galaxy in view.


Hey David best and most interesting article i read on the subject in the past 3 years out so THANK YOU!!!
I use a 150mm 2.8 mako (sigma) pinsharp and relatively light.
I would have the option of melting lead disks, what do u think? The allu, tube is mainly for weight? why not a steal rod?
Oh one more thing, what software r u using, please? I did everything with PS so far. I am fortunate that I have excess to virtually 0 light pollution here in South africa and Namibia
As said thanks for ur post and looking forward hearing from you
Hi Guido, thank you for the encouraging feedback. Yeah, I love the Samyang but it is a beast at almost 2 pounds. Lead is a viable option for a counterweight but with young kids and pets around, I opted for steel washers for safety. As for the counterweight aluminum tube shaft, in this version, it’s mostly just to support the counterweight. That said, I am thinking about using stainless in the Gamma version of the star tracker. That would definitely help with balancing and it would be less susceptible to flexing. I wouldn’t be inclined to use regular steel because I’m sure it would quickly oxidize and I wouldn’t want to care for it. I’ll decide soon on stainless vs aluminum.
For post-processing software, I’m using Siril to process and stack my photos and then Starnet++ to separate the stars and the background. I finish everything up in GIMP. Most of the software I’m using is open source. I like the price and I appreciate the communities that support the development of this hobby. I hope someday to be able to contribute and give back. We’ll see, I’m still relatively new in this hobby but loving it.
And I’ll just tell you how jealous I am of your clear skies. I spend most of my time shooting from Bortle 6 skies. I do have a plan to hop over to some Bortle 2 skies in the fall though. Stay tuned.