![]()


You name it, I experienced it this evening. And I learned a very important lesson along the way. Just because the skies are clear doesn’t necessarily mean the skies are clear. Confused? There was a delightful break in the clouds tonight. However, the humid ultra-still air fueled a heavy misty fog over the neighborhood. Couple that with the lingering smoke from a few wood and coal furnaces and you have a recipe for disaster. But the cherry on top was my dew heater running out of juice about halfway through my session. So it was a horrible evening for imaging. But the smokey and wet conditions did little to dampen my mood as the weather was just good enough for more Star Tracker Gamma testing. And I’m happy to report that I have managed to duplicate Gamma’s amazing tracking performance from a few nights ago.
It Was Crazy Wet
I’m struggling to remember the last time I was outside in such soaking conditions. I’m not sure it was the smartest idea to expose all my equipment to this much water. But since I was already set up, I figured I’d just go for it. To give you an idea of how bad things were, here is a small collage that shows the sky glow and moisture conditions throughout the night.

You’d be tempted to think that perhaps I wasn’t taking care of my camera settings. That’s simply not the case. There were no good settings for imaging tonight. But my goals are simple. Just test Gamma’s ability to track. My first night out with the production version of Gamma couldn’t have gone any better. Now it was time to attempt to duplicate my results with the 50mm lens. So yeah, I’m still a bit nervous about Gamma, but I’m also feeling really good about what I’ve created.
I decided to shoot a new target this evening. I thought it would be good to aim the camera in a slightly different direction just to change the setup a tiny bit. So tonight I shot the Heart and Soul nebulae. My Canon EOS 250D is an unmodified camera so I’m not expecting to get a lot of detail. But I am curious to see what if anything will come through when tracking.
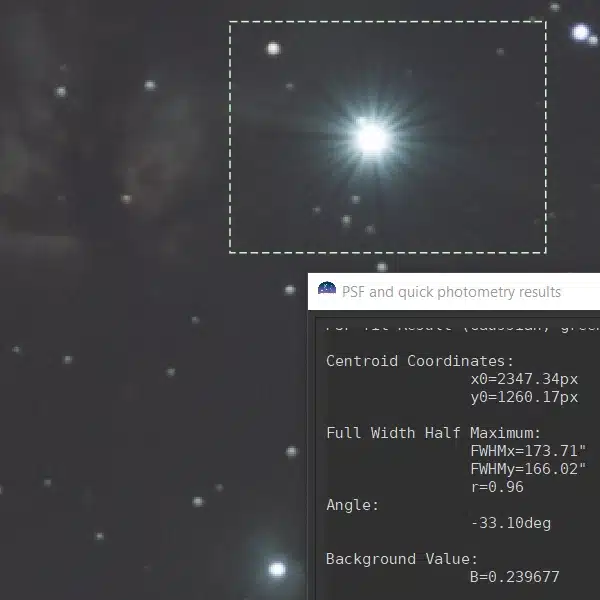
Another New Thing – Plate Solving and Stellarium
OK, so I guess I wanted to test a little bit more than just the tracking. You’ll recall that during my test of the Canon 75-300mm lens that my dad gave me that I was really struggling to find my target in the sky. So I decided to set up plate solving in APT and link that to Stellarium. The idea is that while I am trying to find my target, I can plate solve my test images. Then I can send that information to Stellarium and see exactly what my camera is framing in the sky.
I’m not sure I could have figured out how to set this up on my own. But david_taurus83 over at stargazerslounge.com wrote an amazing tutorial on how to get this working. I followed his instructions step by step and everything worked without a hitch. The only question that I had was whether I needed to account for my APS-C focal multiplier when specifying my lens focal length. Through testing, I can confirm that you should just use your actual lens focal length when setting things up in APT. APT handles the settings based on your camera body and the lens for you.
Here is a screen grab showing the plate solving and the export to Stellarium. For what it’s worth, I am having better results with using the “Blind” plate solving routine than the “Solve” function.

Amazing Tracking Results
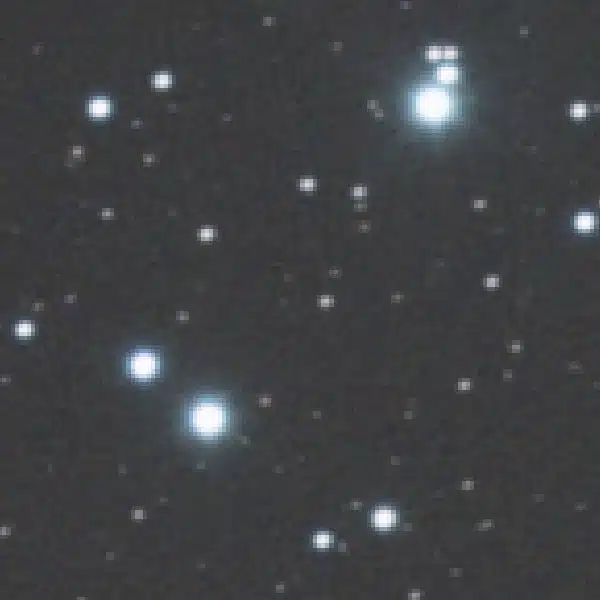
No need to beat around the bush here. The tracking results from Star Tracker Gamma were amazing. I was shooting 45-second exposures at f/4 and an ISO of 1600. Given the environmental conditions, I knew I wasn’t really going to be processing a proper image. I ended up taking about 200 photos over the course of 3 hours. I went photo by photo through the first 100 images and couldn’t find a single wonky image. Every photo ended up looking something like this random image I pulled from one of the less light-polluted photos.

It’s a shame I wasn’t able to produce a final image. I mean I tried, but it was just super rubbish. I definitely pulled out some of the detail from the Heart and Soul nebulae, but I’ll wait for a better night to give this a whirl again. After some reflection, I’m a little surprised that I didn’t image this section of the sky before as this star field is really cool.
Not much more to say about this session. I think it’s time to move on to testing the 135mm lens on the next night I can get out. Given how well the tracker performed with the 50mm lens, I’m expecting big things from the 135mm test. Then I’ll get a better sense of how the tracker handles a bit more weight.