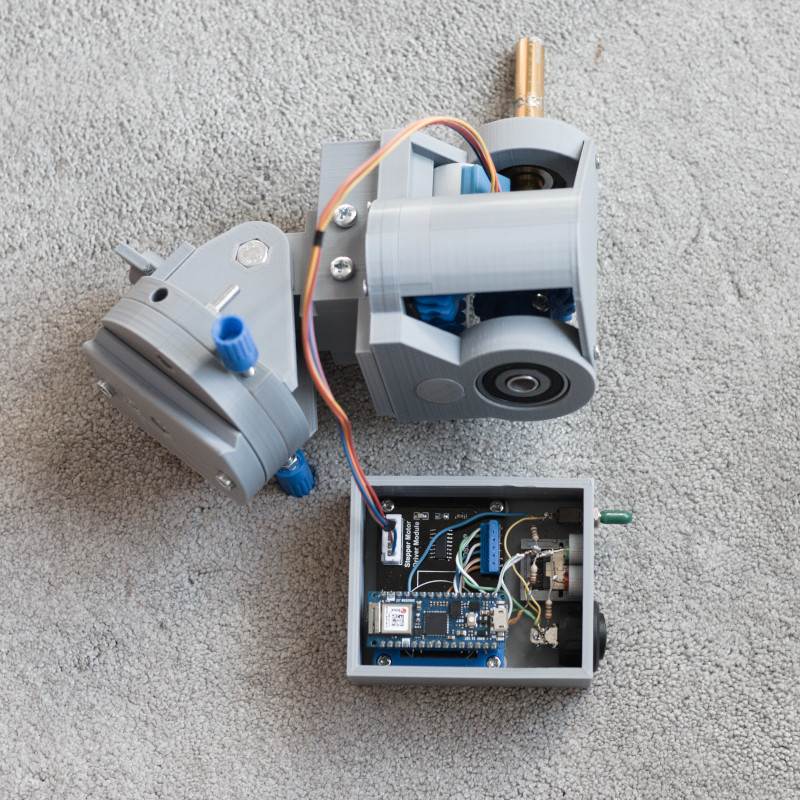
I’ve fallen a little behind on my posts lately. I’m sure you can forgive me when you learn it’s due to my accelerated efforts in getting Star Tracker Beta to a minimum viable product state. Yes, I’m really, really close. And I think you’re really going to enjoy seeing what I’ve done. Furthermore, I’m confident that I’ll have it outside on the next clear night. Don’t get me wrong, still a lot of work ahead. But I’ll be able to start testing it! That however brings me to deliver some sad news. To finish Beta, I need to cannibalize some parts from Alpha. That means Star Tracker Alpha is officially retiring.
Yes, I’m Nervous
Alpha is a working star tracker that delivers consistent results. It has its quirks and I have to whack it from time to time to get it moving. But when it’s imaging, it’s doing a fine job. If anything, I’m disappointed that I couldn’t get outside more with Alpha to really give it its due. The weather this year just didn’t want to yield.
So you can imagine how nervous I am at the moment. I’m disassembling a working star tracker. I have high hopes for Beta, but I’m not going to be able to shake my trepidations until I see Beta working. So until I get outside with Beta, I’m kind of holding my breath. I hope it will be worth it. Especially because we had a beautiful night outside a couple of days ago and I wasn’t able to get out. Yes, I could have done some short-exposure work, but I made the executive call to do a little more printing for Beta.
Learning Is Progress
Despite my nerves, I have good reason to believe that Beta will be everything I hope it will be. This is because of all the good things I’ve learned while testing Alpha. Even though Star Tracker Alpha is retiring after a very short career, it has been instrumental in driving the design for Beta. All learning is progress and I hope to see in a very short time, how valuable my learning with Alpha was. Here’s a short list of some of the best things I learned from testing Alpha.
Solid Base
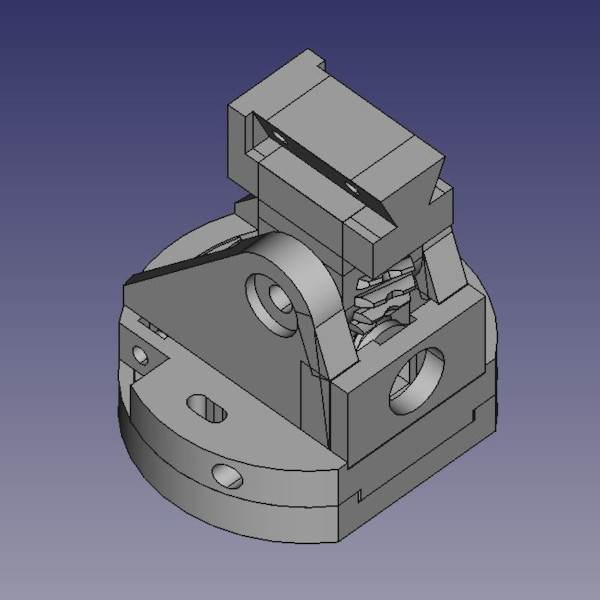
Plastic is flexible and that’s always going to be a challenge when you’re supporting heavy loads. Being flexible isn’t necessarily a bad thing. But when you’re trying to keep a moving mass of 3kgs oriented in a very precise direction, it can be tricky. Originally I designed a 3D-printed wedge to use with Alpha. But the flex was just too much as the weight shifted during an imaging session. So I moved to a solidly fixed wedge to mount Alpha. This worked great, but the downside is it will only work at my Lattitude.
For Beta, I’m waiting to receive an Omegon Polar Wedge. This will provide the rigidity I’m looking for and allow me to travel around and make the necessary fine tuning adjustments to really lock in my polar alignment. I’ve wrestled with this – trying to design my own tunable wedge. But I seem to be lacking a CNC machine to craft what is necessary for this endeavor.
Smooth Gears and Torque
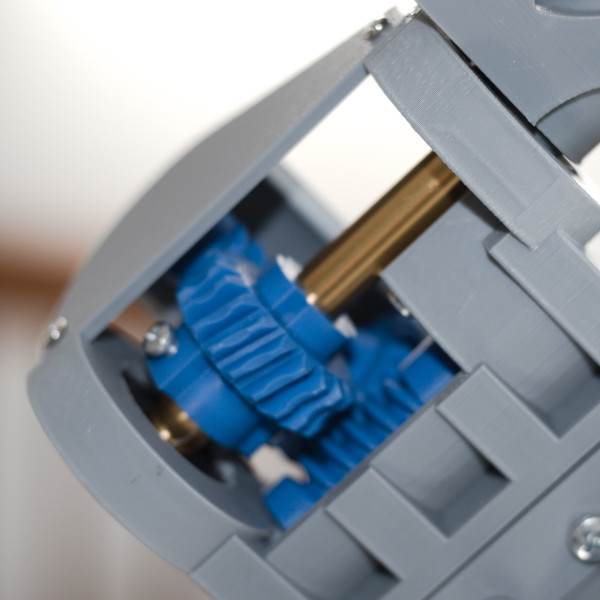
3D-prints can be a bit rough. And that’s what I learned all too well with Alpha’s gears. I didn’t process Alpha’s gears at all after printing. Even though the step height was only 0.1mm, that’s enough to bind when the gears are meshing under load. It wasn’t really a big problem when I mounted the 50mm lens. But the weight of the Samyang lens really brought this out. Proper balancing goes a long way to mitigating these binding effects, but can’t eliminate them. I polished Beta’s gears for hours and hours and hours – OK, while watching Netflix. I expect the smooth gears are going to make a big difference.
Alpha was designed with a gear reduction of 100:1. This worked quite well and I was happy with it. But I do think with the heavier lenses I was creeping up to the point of stalling out the motor. In fact, if not properly balanced, the motor stalled out quite easily. So for Beta, I decided to roll with a gear reduction of 256:1. This more than doubles the torque in my system and when paired with the smooth gears, I don’t think I’ll have any problems.
Mount Head
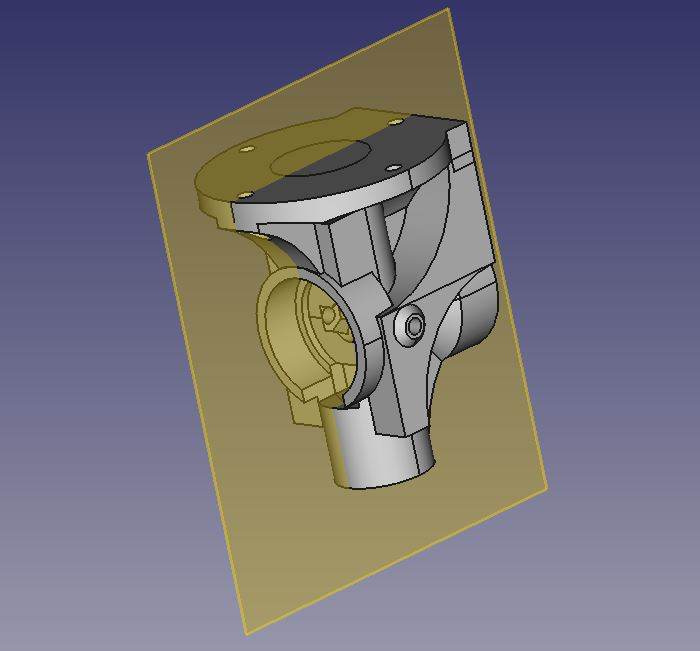
I wanted a very clean and smooth movement of the mount head on the shaft of Alpha. This would allow me to better balance my setup and produce better images. I used two press-fit ball bearings on the mount on the shaft and provide a perfectly centered alignment. Worked great! But the downside was that once I put the mount in place, it was kind of there forever. No way to detach the mount head. I’ve gone a different direction in Beta which I’m really excited about and will detail further when I post about building that component. Beta’s mount will be fully detachable.
To lock the mount head in place, Alpha, used two opposing screws to pinch down on the shaft. I think this would have been fine if my shaft was made of stainless steel. But Aluminum? Nope. The screws really tore up the shaft. At some moment in the future, they would have cut clean through. For Beta, I’m using a tube clamp concept to pinch around the shaft to lock the mount head in place. This is a bit risky, as there is some potential for slipping. However, if I keep the mount balanced, there should be very little force required by the clamp to keep it in place.
Counterweight and Counterweight Shaft
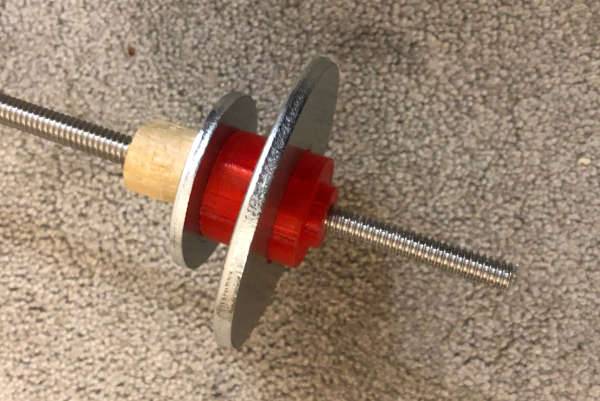
Alpha used an M8 threaded rod for a counterweight shaft and this was serviceable enough. However, if I wanted to move the counterweight, I needed to wind it up and wind it down the rod. Total patience tester! And as I’ve mentioned before, when the weight sits too low on the rod, the rod flexes quite a bit leading to harmonic motion in my images. So for Beta I’m going to use another length of Aluminum tubing for the counterweight rod. This will provide the rigidity I require and give me a nice surface to slide the counterweight up and down.
As for the counterweight, I’m going to stick with the same steel washers I used in Alpha. The only difference is that I’m going to enclose them and employ a similar clamping technique that I’m using for the mount head to lock the weight in place. There are two advantages here. First, I can easily move the weight to balance the rig. Second, I can design the weights to be much more precise. For starters, I’ve created a 1kg counterweight for Beta. But I’m also going to print a 0.5kg counterweight for Beta in the future. This will give me the control I need to best balance the rig.
Enclosure
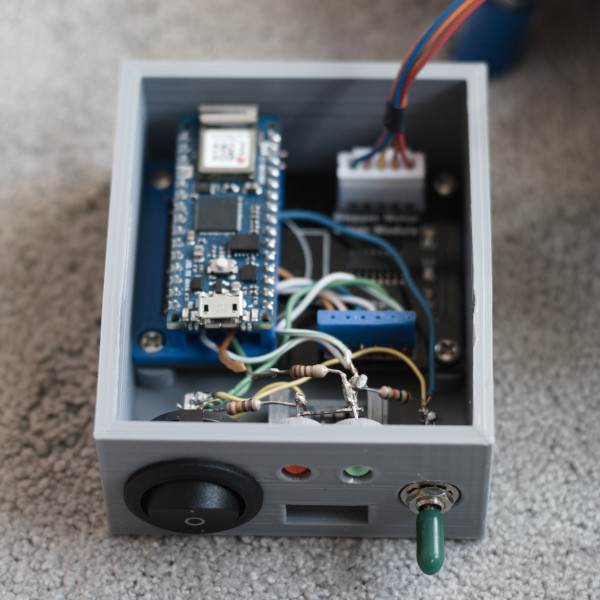
Alpha used an open design so I could access the internals while testing. This also meant that I had the electronics hanging off the side of the tracker. Good for what it was, but for Beta, I’m going to fully enclose all the elements of the tracker in one unit. This is safer for the tracker and makes it far more portable.
One cool thing about Alpha’s design was the external electronics. I call it a happy accident. Because I can actually use Alpha’s electronics to drive Beta during the initial testing. This is advantageous since I can test things without having to mess around with the delicate work of soldering and wiring. Once I’m satisfied with the initial testing, I’ll move to rig up the enclosed electronics. But minimizing time-to-value, or as I like to call it, time-to-fun is a huge benefit.
Bittersweet Retiring of the Alpha Tracker
We’ll I didn’t get to do too much with the Alpha tracker. But I’m happy to say it turned out to be a huge success. FAR exceeded my expectations. And if Beta successfully employs the lessons learned from the Alpha tracker, I know I’m going to be very happy with the results. In fact, I’m seriously thinking that I may not need to purchase a commercial tracker after all for this hobby. That is how well I think things are going. But we’ll just have to wait and see. All in all, it’s a bit bittersweet to be retiring the Alpha tracker now, but there’s hopeful excitement on the horizon.
Next up for me is to put the final touches on Beta to bring it to an MVP state. I’ll be posting more about my progress soon once I finish assembling the next few components. So stay tuned.
As always, feel free to ask any questions or offer any comments. Leave a comment below!
