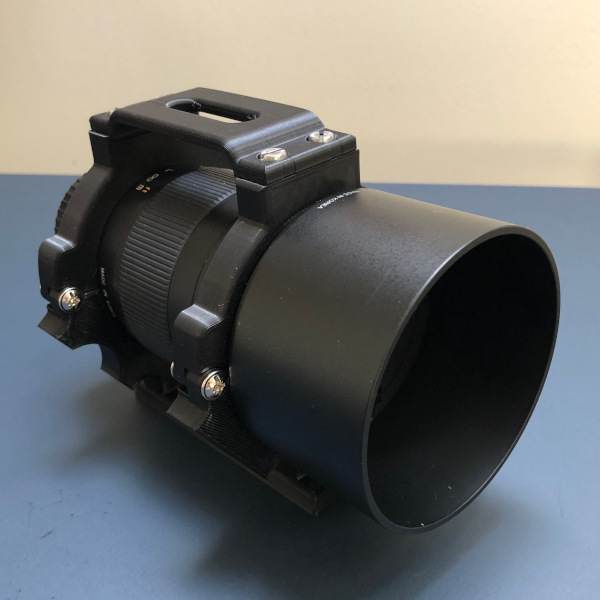
I’ve used a very reliable lens collar that I designed and printed for the Samyang 135mm f/2 lens for over half a year. So that begs the question, why do I need a new one? Well, for one thing, I need a collar system that is a bit more compact and portable. Then, my current lens collar has a lot of sharp snaggy corners that I’m looking to knock down a bit. Finally, and most importantly, I’m ready to design a hands-free focusing system for this lens. Basically, I want to develop a solution that will allow me to quickly and reliably achieve focus so I can really sharpen my images up and give me the ability to focus throughout my session without compromising my setup. So a new Samyang 135mm lens collar is on the menu.
So Why Now?
Fair question. For the better part of this year, I’ve been content to tinker and experiment in my backyard. In fact, I love the freedom and flexibility of being able to tinker around with my gear and still being able to binge on Netflix from the comfort of my couch during an imaging session. The only real problem is that my home is squarely plopped on the border of a Bortle 6 and 7 zone on the outskirts of Krakow. And now that I’m gaining confidence in using the Gamma Star Tracker, I feel I’ve outgrown my preferred shooting location. I’m aiming to spend much more time on the road this coming year to hit more dark sites. So I’m currently experimenting with my gear and my setup from a portability perspective. Hence the need to redesign and upgrade my old lens collar.
Make Hard Problems Easy
I have two main goals for this project. First, make it more portable. Second, integrate a focusing system into the collar that I can somehow remotely control. It may not sound like it, but this is actually a rather complex project. So as always, it’s best to break hard problems into smaller and more manageable pieces. I see 4 primary design elements in this project; the lens collar, the focuser, the focuser controller, and the remote application.
I’ve already made some headway with the remote application and the focuser controller, but that will have to wait for a future post. That’s because we have some clear skies on the horizon so I have a little extra motivation to get the basic lens collar printed.
Samyang 135mm Lens Collar
Let’s get down to business. To construct the focuser, I need a 70mm ring, an 80mm ring, an Arca-Swiss base plate, and a top plate. Below is a FreeCad picture of the build.
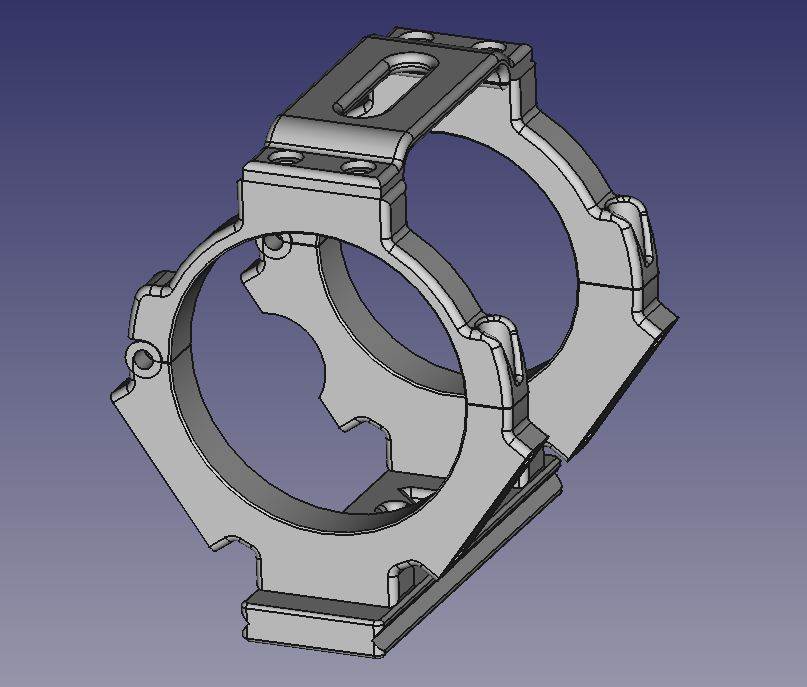
As you can see, this design utilizes hinged rings. The hinges are secured with bushings which allow me to open the rings up to set the lens in place. M5 screws secure the base plate and the top plate to the rings. M3 screws lock the rings down opposite the hinges. You will also notice that each ring has 2 extrusions on the lower ring half. These will secure the focuser motor and electronics using M4 screws in the near future.
The 70mm and the 80mm rings are so named for the diameter of the Samyang 135mm lens at the ring positions. However, I’m not printing these rings to these diameters. Rather, each ring has a diameter that is 1.4mm wider than the lens. I’ve done this because I will mount a thin strip of foam rubber around the inside of the ring. I’m doing this for 2 primary reasons. First, I don’t want to scratch the lens. And second, I want the lens to be held firmly and securely in place by the ring. Foam rubber will help accomplish both of those objectives.
The six printed parts are loaded into a FreeCad file that can be downloaded from my 3D Printed page.
Assembly Notes
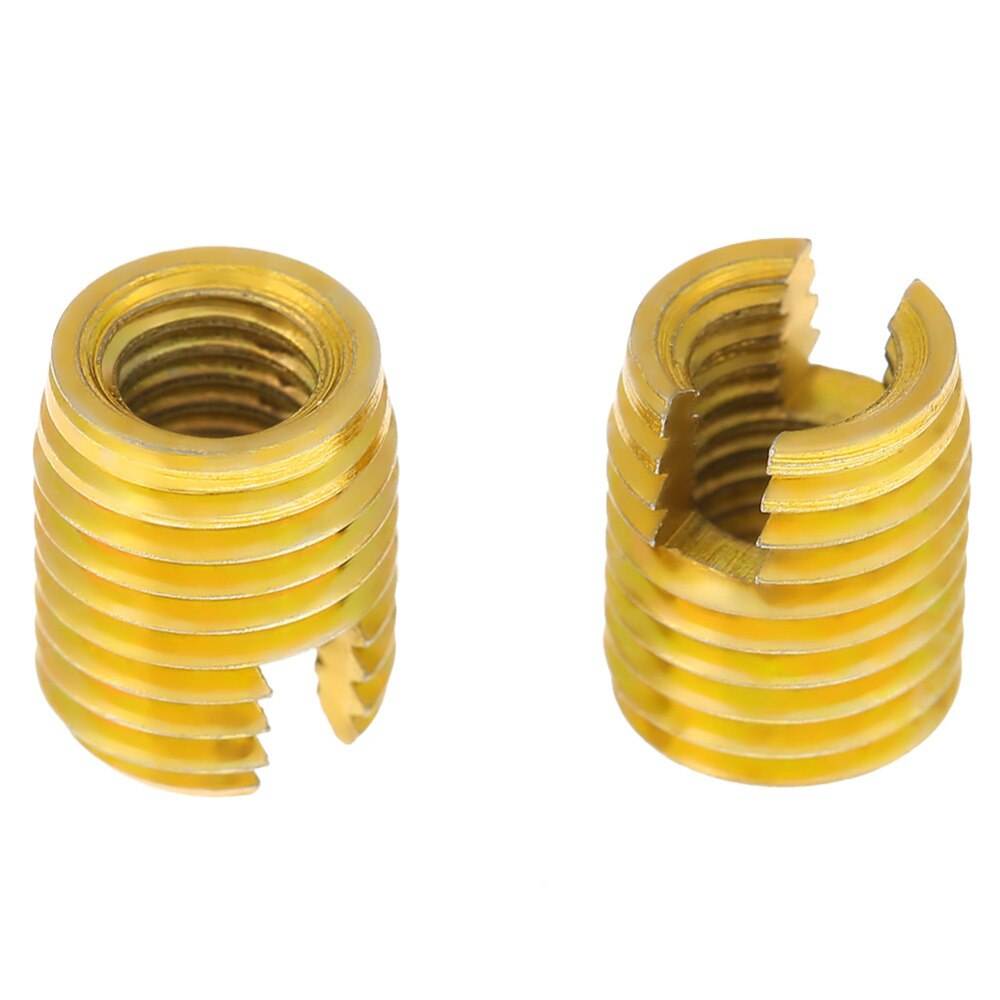
Now, you may be wondering how all these screws actually attach to the lens collar. Well, for the first time in my prints, I’m using self-tapping threaded insert screws. I was a little skeptical to try these on this project, but for the most part, they worked out great. The M4 and M5 inserts are rock solid in place. However, the M3 inserts are a little temperamental. They just don’t have the thread size to really lock into place. But this is easy to remedy by applying a little dab of Gorilla Glue. Overall, these inserts simplify the design significantly and improve the overall stability as I don’t need to bore holes on the inside of the rings for the nuts.
Lens Collar Parts List
| Printed Parts | Quantity |
|---|---|
| 70mm Ring Base | 1 |
| 70mm Ring Top | 1 |
| 80mm Ring Base | 1 |
| 80mm Ring Top | 1 |
| Arca-Swiss Base Plate | 1 |
| Top Plate | 1 |
| Assembly Hardware | Quantity |
|---|---|
| M3 Self-Tapping Threaded Insert | 2 |
| M4 Self-Tapping Threaded Insert | 8 |
| M5 Self-Tapping Threaded Insert | 8 |
| M3 Screws 10mm L | 2 |
| M5 Screws 12mm L | 8 |
| M5 Threaded Bushing with Screw (length cut to size) | 2 |
| Adhesive Foam Rubber (cut to 12mm width inside rings) | 1 |
Lens Collar Images
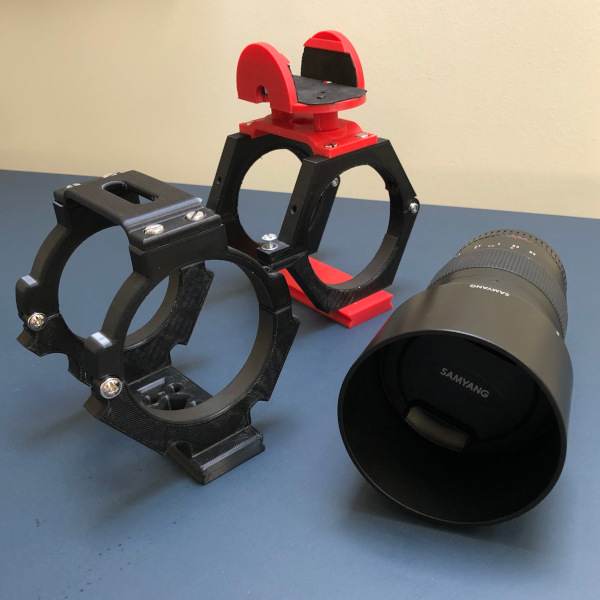
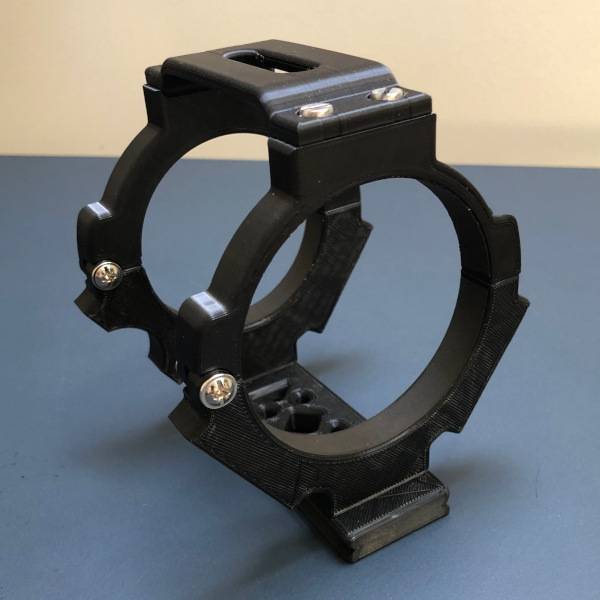
Here you can see the images of the Samyang 135mm f/2 lens collar with and without the Samyang lens.

| 
|

Wow, really clean design here, and I love the forward thinking in those mounting provisions. Putting the mount holes at the bottom of the ring will allow for a lower center of gravity when mounting a guidescope. Should be easy to counter balance a small one with the autofocus bits.
Any chance there’d be a version of this that will work with any generic Arca Swiss plate with one middle groove as the base plate? The use case is for photographers who have an excess of plates already that they want to reuse instead of printing a new one. M5 bolts will go through said groove made for 1/4-20 bolts easy, nothing a washer can’t hold securely.
Thanks!
Hi Marc, Thank you. Finishing the new focuser is on my list of to-dos, but I’ve just been testing and tweaking my latest printed star tracker design :).
As for reworking the collar rings – I think I understand what you mean but please send me a link or tech drawings for the plates that you are referring to. I’ll rework the rings next weekend when I return from my business trip.
Hello David,
Thanks for the reply. Basically, the idea is that the bottom parts of the rings will have ONE M5 hole at the center of each ring section instead of the current two. The idea is to allow the rings to be centrally bolted on top of existing Arca Swiss plates (instead of off-center in the current design where a user has to pick one or the other side).
No rush on this; unfortunately I don’t know how to attach stuff here (if it’s even possible) but what I’m describing is how the OpenAstroTech design attached the bottom plate to the ring bottoms (one bolt only). I’m not even sure if there are structural implications on this approach, too.
Thanks, and a safe and productive business trip to you!
PS – it’s crazy how we can now just 3D print stuff that previously were exclusively in the realm of big businesses eh?
Evening Marc,
I just uploaded 2 new stls to Thingiverse entitled SYLC_70mmBaseRingSingleHole.stl and SYLC_80mmBaseRingSingleHole.stl (https://www.thingiverse.com/thing:5615266). I hope this fits what you are looking for. I like the stability with both holes on the ring and top plate but I don’t think there is any serious structural issue with attaching using single M5 screws on the base. A threaded insert should hold well without issue.
It is amazing what you can 3D print now. I just finished a new tripod computer mount yesterday which I’m sure I’ll write about soon – stay tuned! And I appreciate the comments and feedback – thank you.
Thanks for making this. I just purchased the Samyang 135 and was looking for a mount to use on the SWSA GTI that should be coming any day. This may sound obvious but I was wondering when you install the self-tapping threaded inserts do they just screw into the bore holes ? Should some glue be applied so they don’t turn when the screw are screwed into them ? Also is it possible to show a photo or provide details about the closure side of the rings. Its not clear to me what hardware is used to lock the rings closed and its not possible to see that side well in the photos. Thanks again.
hi David, good job! is it possible to attach a polar scope over the top plate?
Hi Rodrigo, yes, the top plate can be modified to add whatever you’d like to the system (I’ve posted the FreeCAD files on Thingiverse so you can customize them). The only concern that I would have is if you are using this for polar alignment purposes, it might be difficult to ensure that the polar scope would be sufficiently aligned with the rotational axis of your tracker for precision. Right now I am using a polar scope to roughly align my mount, and then using N.I.N.A.’s Three Point Polar Alignment routine to polar align my whole setup – and this works quite well for the focal lengths that I’m shooting (50-135mm).
Thanks a ton for posting this David. I’d like to change the design a bit for my accessories. For example I’d like to change the top plate so it’s flat instead of having the raised arch. I’m using FreeCad for the first time, I’m not able to figure out how to edit the profile of it in the Sketcher workshop. Can you give any pointers on how I’d go about this? Thanks!
Hey Moshen, you’re welcome. As mentioned on Thingiverse, look into the Part Workbench for modifying the FreeCAD file. Also, if you’re using a dew heater as one of your accessories, you’ll want to think carefully about how you modify the top plate otherwise you might not have enough clearance. Let me know how you make out.
Would you be able to modify this design to another lens and send me the desing?
Good Afternoon. The short answer is maybe. Drop me an email and tell me what you’re looking to do.
Sent you an email – its for the Tamron 150-600mm