The cloudy weekend may have blanked me in the photo department, but I had plenty of time to print a test piece for the Samyang 135mm f/2 Bluetooth Low Energy (BLE) focuser that I’m working on. You’ll recall that incorporating a focuser was one of the main reasons for my new lens collar design. So with a few hours to burn on Saturday afternoon I said heck, why not? I designed a quick test rig and a breadboard circuit in order to test if my focuser solution is viable.
Controlling the Samyang 135mm f/2 Focuser

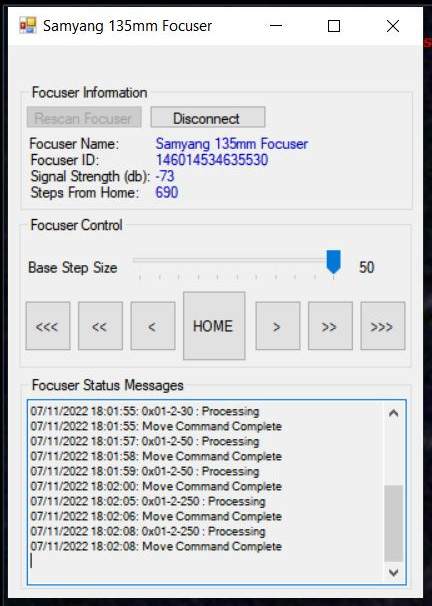
The Arduino Nano 33 IoT chip that I’m using supports BLE communication. This seems like an ideal strategy for this project. It eliminates the need for yet another cable to tether to my computer and simplifies my design. I’m using a C# Windows Forms App to communicate with the Arduino chip and while there were some hiccups when I originally looked into this, I finally got this working a couple of weeks ago. The Arduino code ended up being fairly trivial to write and I’ve structured my code to once again be non-blocking. The image on the right is a screen capture of the Samyang 135mm Focuser program that I wrote. I’ll post all the code for this once I fully complete the project.
With this Windows App I can scan for my focuser, connect to the focuser, and step the motor forward and backward until focus is achieved. The stepping precision can be controlled using the Base Step Size slider and eventually the app will have homing capability implemented using a 10k single-turn potentiometer. That’s all I’m really going to need programmatically for the focuser.
I should note that I’m flirting with an ASCOM solution for this project as well, but I’m just not sure if I want to put the time into figuring that out right now. But when this project is finished, if anyone out there wanted to take a crack at writing a driver, leave me a comment or email me and let me know how to get in touch.
Test Circuitry and Collar Test Rig
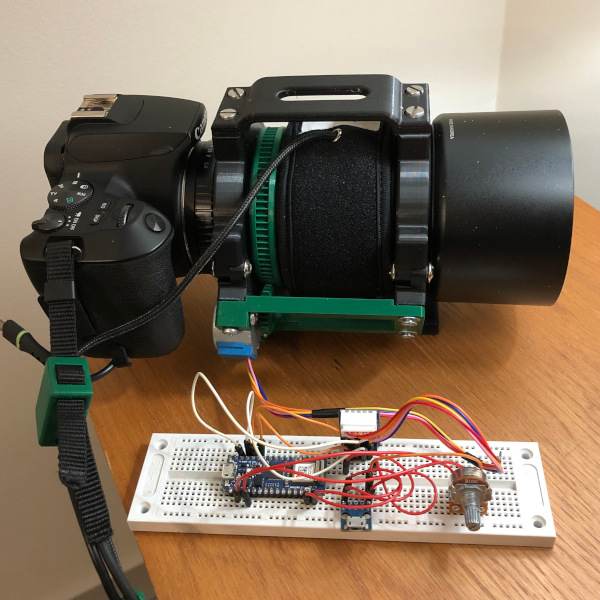
As with most of my designs, I like to print concept pieces to test the functionality of my ideas before I create a finished product. And that’s what I did here. If I completely overlooked anything or if something doesn’t work exactly the way I expect it to, I’ve at least minimized my time to failure. So here is a quick photo of what this currently looks like.

Good grief David, that breadboard is a hot mess! Yeah, I used to hear that a lot when I was at university. But my motto as an electrical engineer is, “If it ain’t smokin’, it ain’t broken.” Eventually, most of the electronics will mount on the other side of the lens collar. And the stepper motor will also be covered up along with the potentiometer to track the home position.
I’m confident that the code will work fine, but I’m not quite sure how well the assembled test rig will perform when I’m actually outside focusing. So only one way to find out!
First Focuser Test
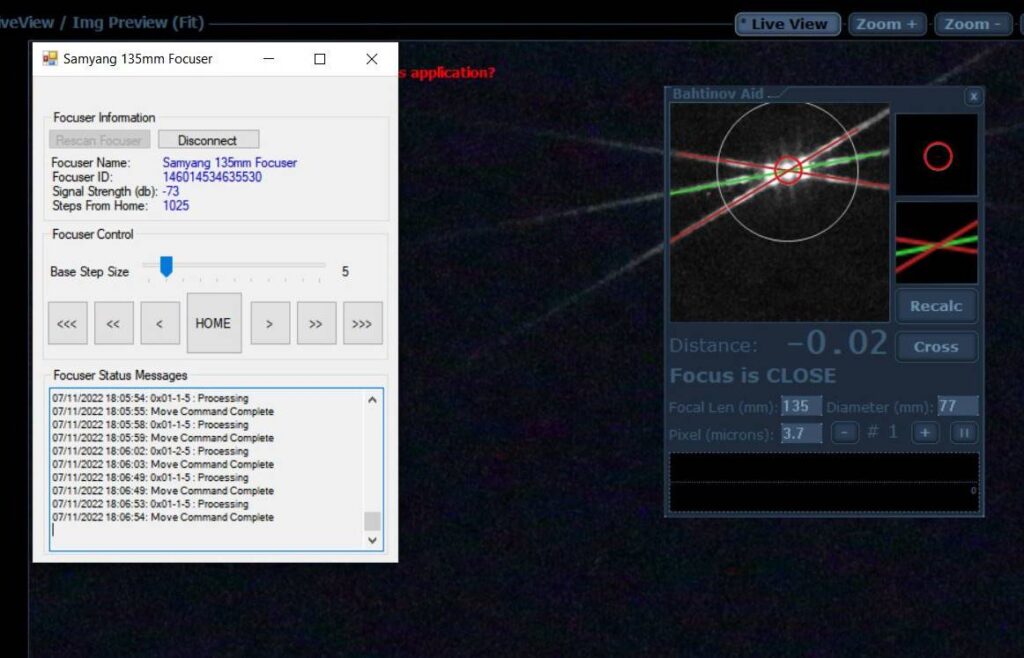
Well, it’s a bit cloudy tonight and we’re nearly under a full moon. But it’s clear enough that I have a nice view of Jupiter which should do fine to test the focuser. I threw the electronics in a zip lock back and set everything up on my tripod to run the test. I set my Bahtinov mask in place and to my enormous delight, everything worked without a hitch. And I have to say I was relatively pleased with how easy it was to really dial in the focus.

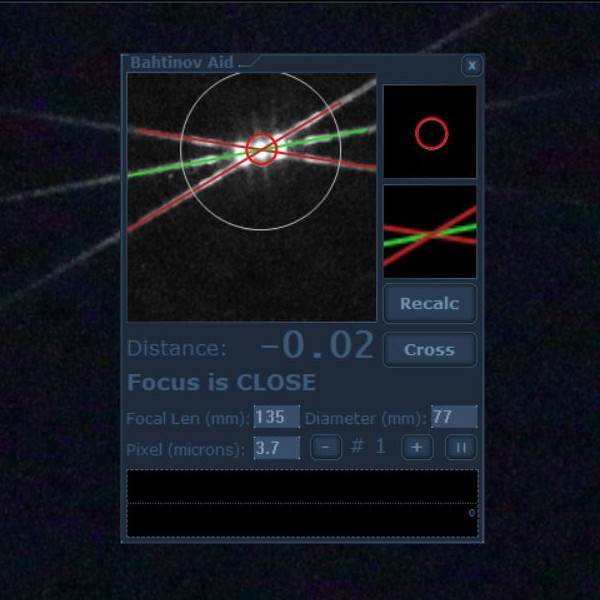
I really just love how easy Astro Photography Tool is to use and the tools that come along with the program. The Bahtinov Aid tool is just simply magic. Before using the Bahtinov Aid, I dialed things in by sight and the first measurement with the Bahtinov aid showed me that my focus was 1.57 FAR. As you can see, I was able to fine-drive the focuser to end up with a much better result.
At this point, I should mention to you that I had another “duh” moment when I got back inside. I had actually taken a number of pictures so I could show you the star quality of the focused image. However, I shot at f/2.8 for 2 seconds … so yeah, star trails which kind of defeats the purpose… facepalm. Oh well, I expect you’ll see the results in my future photos ;).
Takeaways
Do I feel as though I’m on the right track with this design? Absolutely. Any trepidation that I had going into this test is now squarely in the rearview mirror. But that’s not to say that I didn’t learn a few things after getting out that I can think about and/or fix.
- There is a small but noticeable amount of backlash when the drive gear meets the ring gear. I’m not sure this is really a problem for my needs but I’ll probably go ahead and improve this a bit.
- I was originally thinking of powering the focuser from a powerbank. But I’m also thinking at this point that I might consider rechargeable AA batteries. Not sure yet and it depends a little bit on the overall weight.
- I need to think about how to manage the wiring. Not sure how I’ll tackle this quite yet.
- The focusing step size settings seem to work just fine.
Anyway, I’m not inclined to complain at all about my first test of the Samyang 135mm f/2 focuser. With any luck, I may be able to get out tomorrow evening and maybe then I’ll be able to share some sharp star pics!

David,
I am interested in building a copy of this for my 135mm lens. I have already 3D printed the collar, assembled and have successfully used this with my Ioptron Sky-guider pro. Does this focuser Bluetooth to a windows based laptop? I have lots more questions about the focuser.
I feel like I am riding on your coat tails with your research and projects. I am loving your blog and projects. Thank you for posting these things.
Thanks,
Craig
Hi Craig,
Appreciate your kind words. I’m taking a little holiday with my family at the moment, but I’ll do my best to answer any questions that you have. The focuser isn’t quite finished yet, but the code is pretty much done save for a few possible tweaks (like adding code for a potentiometer to prevent the stepper from stalling – but I’m not convinced that would be a big problem). And yes, I’ve written a Windows forms program to control the unit. I’m certain this can be adapted for other platforms, but as I’m currently using my Windows machine to image, that’s what made sense to me. I experimented a bit with a React Native but it was a little buggy – besides, once I got the Windows program working I just considered the development race done ;).
You can drop me an email with any additional questions that you have. Once I get back home in a couple of weeks I’d be happy to send you the latest Windows code.
Cheers, -Dave