![]()


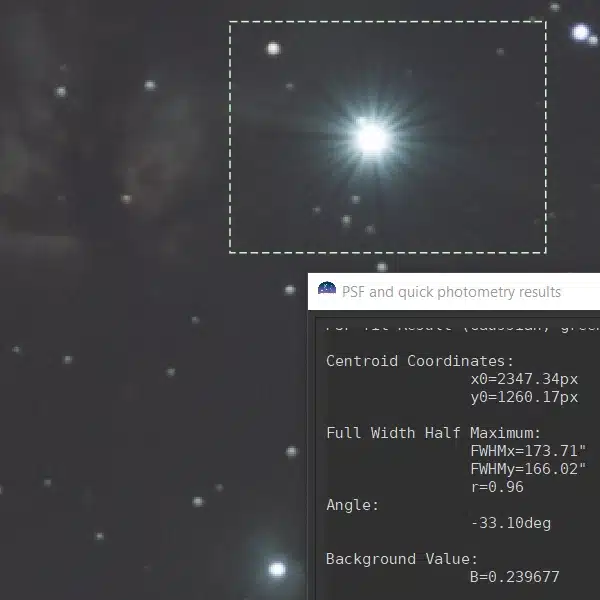
Well, the weather outside is a little less frightful. The snow has given way to light rain and the temperature is unseasonably mild at 10 C. But of course, that means another night shall pass without clear enough skies to get out and image. I really want to put my recent upgrades to the test, so I set up a time-lapse sequence of the Lego Star Tracker in action.
Goals for the Lego Star Tracker Time-lapse Test
The goals for this test are simple – Don’t blow up. Honestly, I’m not worried about this as the 3D printed parts are more robust than I was expecting. But I’ll be looking to see a smooth arc of motion from the Lego Star Tracker in the time-lapse sequence. I’m also waiting to see how this new configuration changes the balance dynamics of the tracker.
The test is pretty straightforward. I want to run the tracker for about 2 hours and create a 25 FPS video using still images of the tracker taken at regular intervals. Additionally, each second of the video should cover about 4 minutes of tracker operation. Rough mental math indicates that I should trigger a photo every 10 seconds to accomplish this feat.
For the test, I used Yawcam to take the images for the time-lapse using an external camera tethered to my computer. I then used OpenShot to stitch it all together. The only issue I had was where to stick the video. Well, YouTube seemed as good a place as any so I quickly put a channel together and uploaded the test. So here is my first ever YouTube video.
I know it’s not much, but this is really just a test and I didn’t want to spend hours putting something together. I’ll try to take some proper video the next time I get outside to test the Lego Star Tracker in operation.
Test Conclusions
Overall, I was pleased with the test results. The Lego Star Tracker performed well and the time-lapse didn’t show any gross movement errors. I do know the balance was slightly off (front to back) as evidenced by some minor binding when the load arm was near the 6-O’clock position. As I mentioned previously, I need to think about adding some kind of mount that allows me to slide the camera front to back. That’s a whole new level of nervousness though. For now, I’m happy to accept some minor balance issues at this stage of the project.
Final Thoughts
But I am getting really really close to success!
I’m also getting close to sharing more detailed plans and instructions for the Lego Star Tracker. That will come soon after I’m satisfied that the tracker works reasonably well for what it is. But a word of caution. You’ll gain more from studying what I’ve done than you will from simply recreating my results. If you have to go out and buy all the Lego pieces I’m using, you might end up spending more money than you would otherwise by simply buying a star tracker.
My point is, this project is more about experiencing the fun of what is possible, rather than producing a commercial-grade device that you’ll throw into your backpack when you go into the field. I do intend to use my device regularly just for kicks and satisfaction. But I will at some point be purchasing a fit-for-purpose product that I know will produce better results than I will ever get with this project.
And finally, one really cool side effect of this project is that it has kept me engaged in this hobby. As I’ve lamented, the weather has been absolutely poor the past few months. It’s kind of tough to take astrophotos when you can’t even see through the atmosphere. This project has given me plenty to do in the downtime between imaging sessions and has helped me incorporate a lot of my other interests into this hobby. Good stuff.