The Samyang ED UMC 135mm f/2 is a lens that’s hard not to love. And you know that I’ve been chomping at the bit to use this lens on my 3D-printed tracking mount. But I’ve been cautious thus far because this is a really beefy lens and I need to make sure that my design can take the weight. This lens is so heavy that I simply won’t be able to attach this to the 3D-printed star tracker via the 1/4″ camera screw. What I needed to do is build a lens mount that would allow me to properly balance the camera on this tracker. And that’s what I’ve done. It’s time to start tracking with the Samyang ED UMC 135mm f/2 lens.
Inspired Design
I mentioned in my last post that I found a nice design for a lens mount on Astrodymium. Of course, I’d need to update this to interface with my star tracker design, but this looks like a solution I can take some inspiration from.
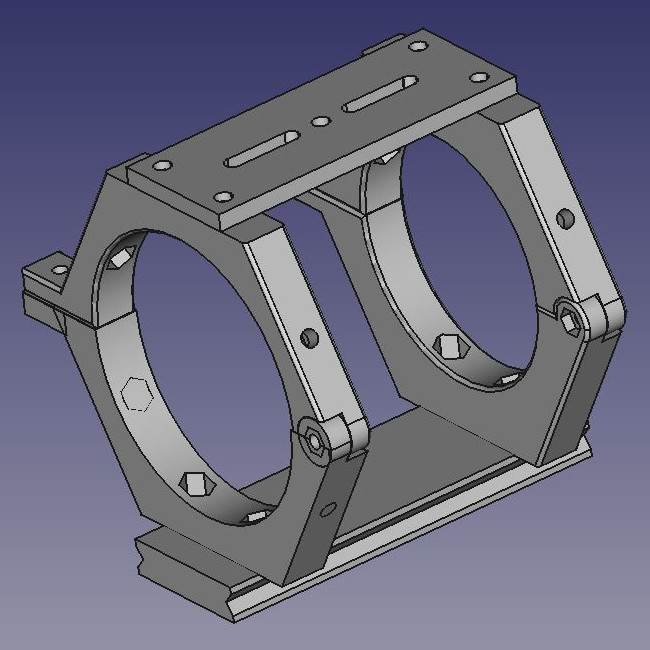
The basic idea is to create 2 rings that would clamp around the Samyang 135mm lens which would be attached to an Arca-Swiss base. There are 2 good surfaces on the Samyang 135mm lens which make for good mounting points. It also helps that the ring diameters are 70mm towards the back and 80mm towards the front which simplifies the design. Like the product from Astrodymium, I wanted to design for the potential to upgrade as I continue to grow in the hobby.
Below is the mount design in FreeCad. All told, there are 6 3D-printed parts.

Printing and Lessons Learned
The parts took about 9 hours total to print all 6. Surprisingly, everything was printed to spec. I did need to do a little sanding of the parts to bring down a high point that was printed around the base of all the parts. I printed the holes for the hex nuts very tight by design. And with a little effort, the nuts pressed in securely.
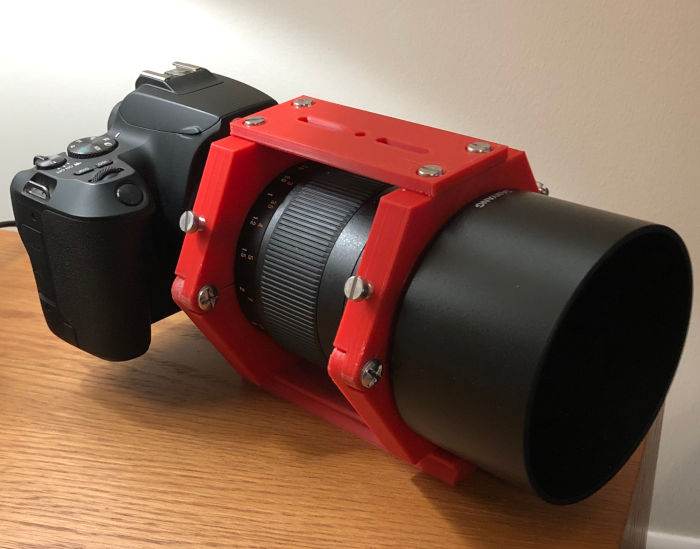
Needless to say, assembly was a breeze and now it was time for the big test – adding the camera. To my surprise, I was able to plop the camera in the rings without any issues. I did find that the rings were a little loose which I solved by adding a thin strip of foam rubber to the rings. That worked a little too well as now the rings are a bit tight. Overall though, this is a solid construction that I’m confident will work.
If I was going to print this a second time, I’d do things a little bit differently. First, I’d widen the rings just a smidge so that after adding the foam I’d get a better fit. Second, I think screw insets would be a better solution than hex nuts. But I didn’t have any on hand for this iteration. It works, so I’m not inclined to mess with it any further.
Assembled and Mounted
Here’s a pic of the camera loaded into the lens mount.

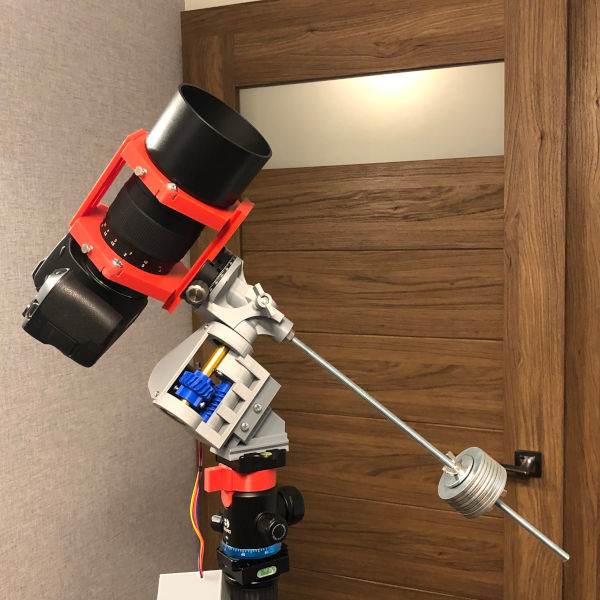
And another pic of how the rig looks when mounted to the star tracker.

I’m still slightly nervous about the weight of this system. But once balanced, it’s clear to me that there’s very little load around the axis of rotation. I did a quick test and the motor with the gear reduction of 100:1 has zero problems driving the load. I am soooooo happy right now.
What’s Next?
Once I finished printing the lens mount, I couldn’t keep myself from thinking about upgrades. The ring mount provides the perfect base to design a mechanical focuser. I have a motor and I have an Arduino Nano 33 BLE Sense on order, so why not? Besides, it won’t add much additional weight. That will be the first upgrade to this that I’ll make after I have an opportunity to get this system outside for testing.
Another thing I’m ready to start looking into is coding a PC-based control program for the tracker and eventually the focusing system. It’s been a long long time since I’ve done any serious software design, but I think I’m up to the task. I’m thinking I’ll use C# to build a front-end program that will use Bluetooth to communicate with Arduino Nanos. These things will definitely be rainy day projects.
And speaking of rainy days… Yep, the clear skies are gone and there’s nothing but rain in the forecast for the next week or so. Oh well, I made good use of the time I had and have lots more to write about in the coming days. So that’s it for now, check back soon for my next update.
