![]()


Getting Ready for My First Photo Shoot
I’ve been around long enough to have learned that despite my best efforts, I’m not going to produce a high-quality photo on my first photo shoot. Heck, I’ll be thrilled if I can even get a good focus. But that doesn’t hold back my excitement, only tempers my expectations.
Point is, it’s more about climbing up a pretty steep learning curve at this point than producing quality photos (by my standards). So I’m not going to put any undue pressure on myself and I’m simply going to strive to learn something new. In fact, that’s pretty much going to be my goal for the foreseeable future. If I can discover something new each time I go out, then I’ve made progress.
So it’s time to get ready for my first night’s photoshoot and while I’m really excited, I’m keeping rather low expectations. But here’s how I’ve prepared.
First Photo Shoot Preparation
Ok, before I head off and start shooting, I need to figure a few things out. First and foremost, what am I going to shoot? Second, how am I going to shoot? Third, where am I going to shoot? Fourth, when am I going to shoot? And finally, what am I going to do after I shoot?
Pick a Target
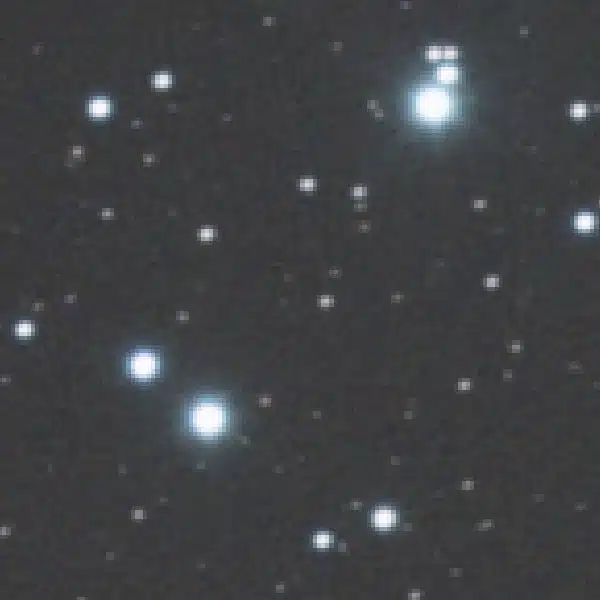
It’s the end of June so I have no shortage of interesting targets to choose from. But I decided to go for something easy and recognizable. Cassiopeia would be easy to find in the sky and focus on. It also sits high enough in the sky at this time of the year to ensure I wouldn’t have to struggle with any horizon issues or obstructions. Good enough!

Imaging Process
I learned through my own online research I’d need to stack my photos to produce a final image and this would also require the collection of additional photos namely; dark frames, flat frames, and bias frames. Seems a bit ambitious for my first night out but I figure, heck, the best way to learn is to do.
I settled on 50mm as my first focal length because it would be wide enough to capture the whole constellation and again, I didn’t want to set myself up for disappointment by trying to be too aggressive with my aspirations on my first time out. I set the aperture to f/5 as that is the fastest I can shoot on this lens and I rather arbitrarily decided to shoot at ISO 800 because, why not? Remember, I don’t really know what I’m doing at this point.
Next, I set the camera and lens to manual. Image quality to RAW since I’m going to be stacking and post-processing. Then I turned off all the firmware-enabled features as I wanted the photos to be entirely manually exposed. I set the camera to spot metering, daylight white balance, and the picture style to Faithful in the canon menus.
Now, I needed to determine how long to open the shutter for each photo. In my research, I learned about the 500 rule but I also came across the NPF rule. The NPF rule indicated with these camera settings I could leave the shutter open for 2.8 seconds and still keep sharp stars. Closest I could set on the camera is 2.5 seconds, so there it is.
My goal will be to get out and take 200 sky photos (light frames), 50 dark frames (photos with the lens cap on taken with the same settings and at the same temperature as the light frames), 50 flat frames (photos of an illuminated flat surface taken under the identical camera settings and focus as the light frames), and 50 bias frames (fastest shutter speed dark frames at the same ISO as the light frames).
Location, Location, Location
Living just outside of Krakow, Poland, I’m completely stuffed when it comes to light pollution. So as I’m just getting started, the best I can do is try to find a suitable location away from any direct light from streetlamps. Fortunately, there are several fields around my neighborhood from which I can shoot without being under the direct gaze of these glowing yellow monsters.
In time, I’ll need to think about how to get to darker skies or what I can further do to minimize the impact of light pollution. But from the site https://www.lightpollutionmap.info I can see that even minimally better dark skies are a pretty good drive away. As it stands, for now, I’ll need to adjust to shooting from class 6 light-polluted skies on the Bortle scale. C’est la vie.

Time to Head Out
Well, I don’t really want to go out on my first photo shoot at night alone. Luckily, I have a young teen who is happy to join me, but only because it means he’ll get to stay up late. In fact, at 50 degrees North, we won’t even set out until after 9 PM as the skies won’t be dark enough to shoot until after 10:30 PM. But we’ll get out into the field and still have plenty of light to get set up.
When It’s All Said and Done
I plan to use the program Deep Sky Stacker after I finish imaging to process, align, and stack my images. The real reason for this quite honestly is because it’s free. Well, that, and I don’t really know what else is out there right now. It’s just what I see other folks using.
I then plan to use GIMP for windows and Linux to post-process my image. The goal for my final images is to attempt to remain as natural as possible. In other words, I want the colors of my objects to resemble their natural state. So I’m not planning on going full psychedelic with anything. But that’s just according to personal taste.
Now Hurry Up and Wait
All the planning and the preparation are complete. Now it’s just a matter of waiting for the sun to set before heading out and taking my first photos of the night sky.