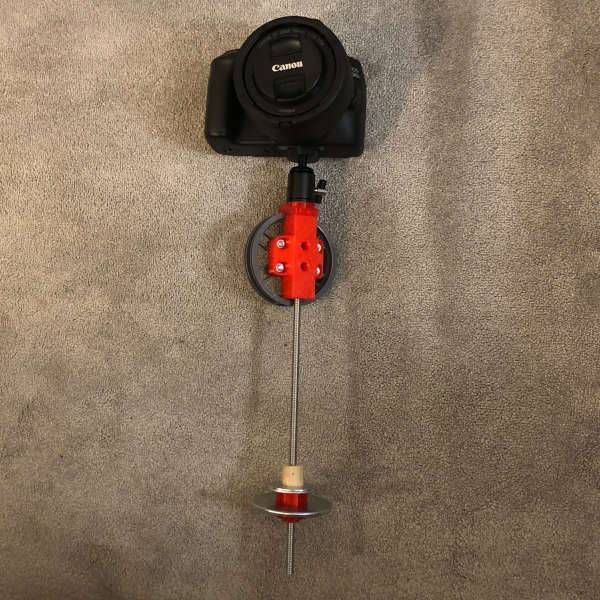
After just a couple of days, I can confidently say that I’m having a lot of fun with the 3D printer. I mentioned last week that I was concerned that I could trace my Lego Star Tracker balance issues to my awful hand tool craftsmanship. So I went ahead and printed some new parts to mount my camera to the device. Today I’ll share the 3D printed upgrades that I’ve made to the Lego Star Tracker.
Before I get any further though, I’m under no illusions that these upgrades are going to totally fix my balance issues. But I am confident that these changes are a big improvement. What I wanted to do for starters is to fix my balance issue on the RA axis. I believe I’ve accomplished that. What I haven’t fixed yet are the balance issues due to declination. I think I have a solution for this in mind, but I want to put the current fixes to the test before going crazy. I’ll talk more about this later.
Fixing the Counterbalance
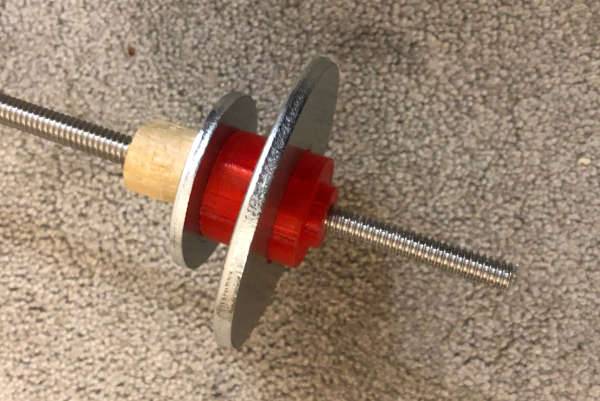
For my first 3D print, I wanted to do something easy and the counterbalance seemed like the right place to start. Basically, I just needed to create a tube with a couple of different diameters to act as a spacer between the counterweight washers I’m using and the threaded counterbalance rod. Easy right?
I decided to use FreeCad to sketch and pad this up. It’s been ages since I’ve used a CAD program but I picked up the basics with FreeCad pretty quickly with a little help from YouTube. There are of course many video tutorials for FreeCAD, but I found this one from thehardwareguy was all I needed to get rolling. So using a set of calipers, I measured my spaces and sketched up my design.
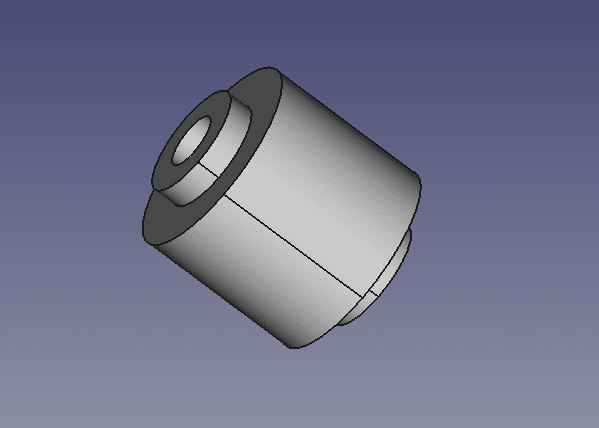
I exported my design to a .STL format, sliced it in FlashPrint, and sent it to my printer. After 30 minutes, I had the first of three upgrades to the Lego Star Tracker completed. I was actually surprised at how well everything fit together. This was not what I was expecting. The bottom spacer for the smaller washer ended up being a little tight, but everything else slipped together brilliantly.
Upgrading the Bracket
A counterbalance spacer is one thing. A bracket to hold my camera is an entirely different beast. I still don’t know how sturdy my 3D printed parts are going to be – at least as far as holding up to the stress due to the weight of the counterbalance and the camera.
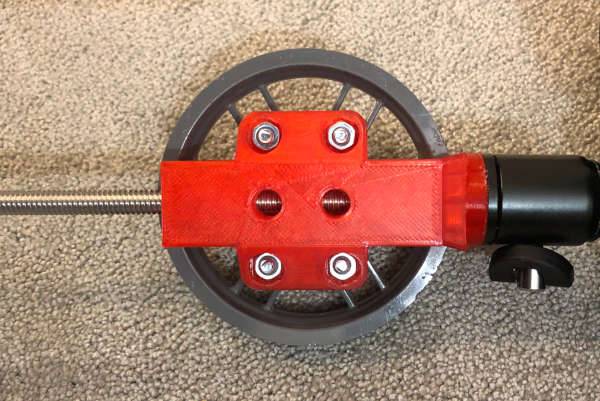
My idea was to simply run the counterbalance rod through the bracket directly into the ball head. As a first pass, this should be good enough. I also wanted to print screw holes in the block so that I could bolt the part to the Lego wheel as securely as possible. And what the heck, let’s go ahead and countersink some hex nuts in this part to really lock it together. I’m just going to play fast and loose with the dimensions and see what works.
It took me the better part of the day to think about how I wanted to do this in FreeCAD, but overall it wasn’t that difficult of a part to design. It’s really not that difficult to figure out FreeCAD once you get going. Below is a picture of the bracket design that I came up with.
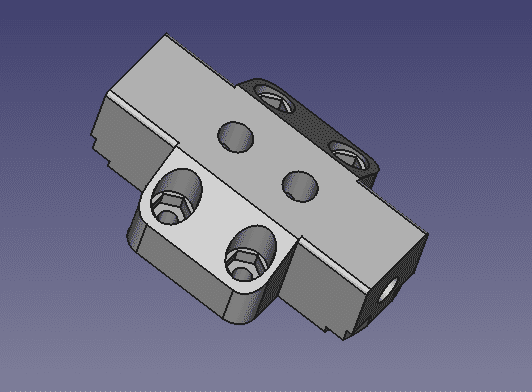
This one took about two hours to print. I also spent a fair amount of time removing the printed base (raft) and the supports I needed to keep everything level and properly dimensioned.
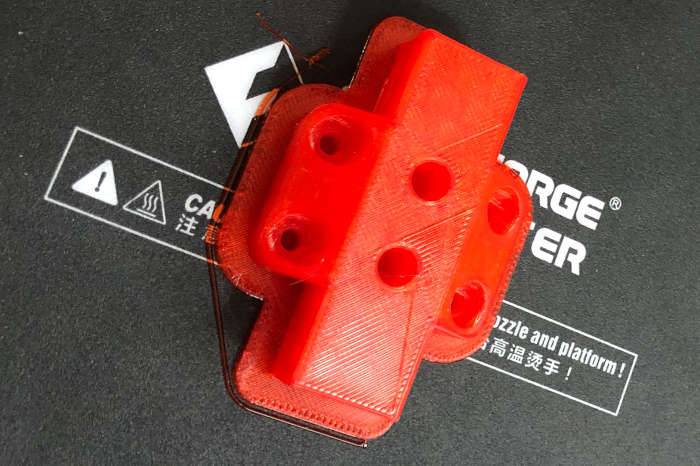
My hex nut recesses for the 3mm screws (x2) were perfect, but my recesses for the 4mm screws (x4) were a little tight. But amazingly, it all came together perfectly and attached very well to the Lego wheel.
Bracket Cap for the Ball Head
Last, but not least, I decided to print a cap for the bracket to seat the ball head. While it may look a little complicated, it only took about 30 minutes to design. About that long to print too. Below is the FreeCAD view of this top cap for the bracket.
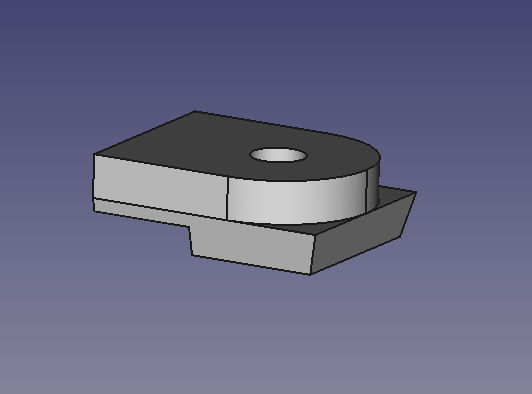
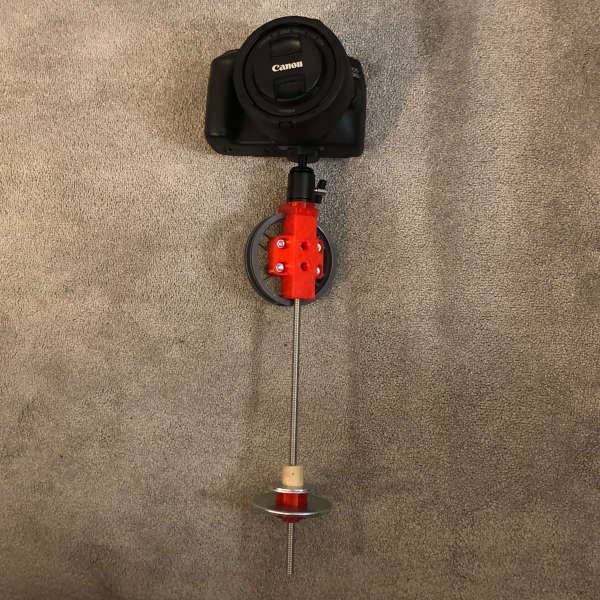
I confess that I actually had to make 2 of these. The first one was a little too long and ended up clipping the sides of the Lego Star Tracker at certain angles. I just shaved 5mm off the back for the second try and it fit perfectly. Here are some shots of the finished prints all assembled.
 |  |
Final Thoughts on the Lego Star Tracker Upgrades
Well, obviously, I can’t wait to test this out. Due to the weather, I might be stuck for a while just testing inside. But I promise, the next good night I have to get outside, I’ll be putting this through its paces. I honestly think I’m close to finishing this project and just have a couple more tweaks to go.
One thing I’m not happy about at the moment with this design is the ball head. Don’t get me wrong, I love the ball head, but I’m not sure it’s the right solution for this project. The reason is that the way I have it mounted here, the camera sits very high in relation to the rotational axis. Closing this distance will definitely improve the balance challenges.
What I think I want to do is design some kind of arca-swiss bracket to hold the camera. This will allow me to balance the load front to back. It would be a bit too much to add the ball head on top of an arca-swiss bracket. Plus, while I’m very satisfied that the counterbalance bracket will take the weight of the camera and counterbalance, I’m not sure a thinly printed bracket will hold up to the stress. At least not with PLA plastic which is what I’m currently using. I want to get out and test this for what it is and then I’ll make a call as to what’s next.
But all said and done, I’m pretty pleased with what I was able to accomplish with the 3D printer. Not only do I think these upgrades to the Lego Star Tracker are functionally better, but they also look a heck of a lot better.
Feedback and ideas are certainly welcome if you’d like to drop a comment. Let me know what ideas you would have for piecing this all together.
