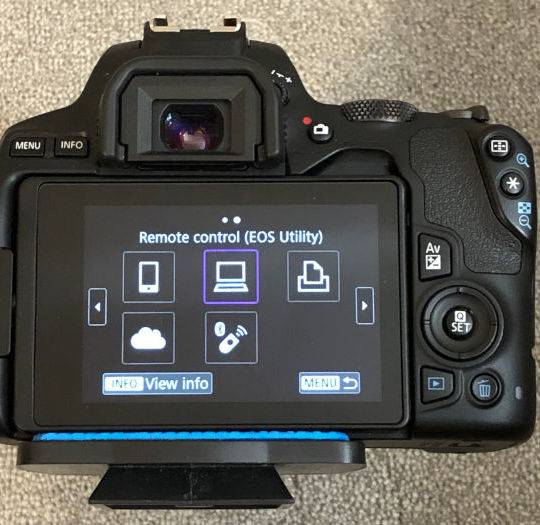
Cables are Getting Out of Control
I have cables to connect my computer to my Canon EOS 250D. Cables to connect to my iPad for the Lego Boost app. There are, of course, cables for the dew heater. USB cables, laptop power cords, extension cords – it’s madness. So I’ve been thinking about how to tame my cable-tastrophy before it really becomes a problem. And good news, I have a solution for at least part of my problem – I figured out how to use Astro Photography Tool (APT) to enable wireless imaging with my camera!
There are a lot of good reasons to untether my camera from my computer. Not the least of which is running my camera with the Lego Star Tracker. Not having to worry about the cable getting snagged or dragging on the tracker is worth it alone. But streamlining any part of an astrophotography setup is worth it when you’re out taking pictures. It can be really hard to keep an eye out for things when it’s dark outside.
Setting up Wireless Imaging for APT
There are a few basic steps to getting everything set up to allow for wireless imaging with APT. First, the camera Wifi connection needs to be configured. Then, the computer’s connection to the camera’s wifi needs to be established. Third, the Canon EOS Utility needs to be run to finish pairing the devices. And finally, APT needs to be launched and connected to the camera.
While the steps seem pretty straightforward, there are in my opinion far too many steps. Using the Wifi and Bluetooth with the Canon camera always felt a little cumbersome. Especially since this needs to be done for every imaging session. It would feel more natural if following the initial setup, everything would just connect and work.
The below method assumes that you have EOS Utility installed on your computer which is part of the suite of programs that Canon ships with its cameras. A lot of what follows is detailed further in the product manual which for my camera is here.
Step 1 – Configure the Canon EOS Wifi
| 1. Navigate to the Canon Wireless Settings menu and select WiFi/Bluetooth Connection | 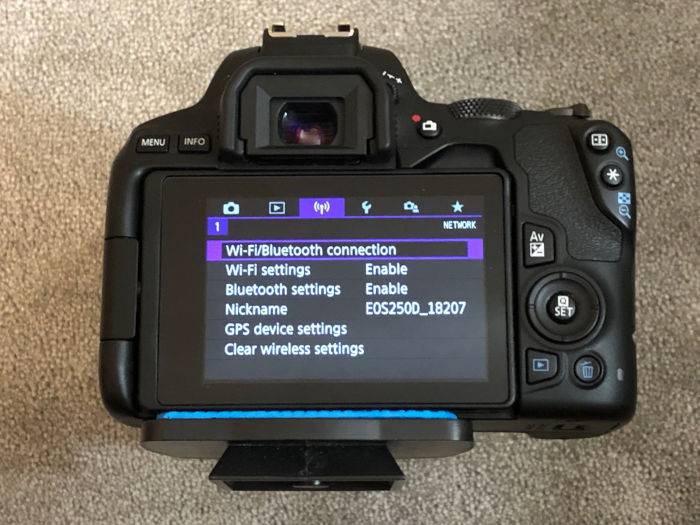 |
| 2. Select Remote control (EOS Utility) from the menu – the one that looks like a computer | 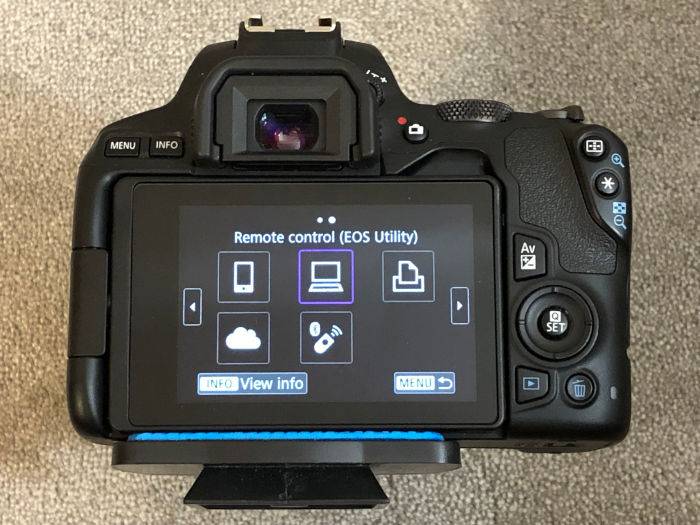 |
| 3. If this is the first time connecting to the device, select Add a device to connect to. Otherwise, you’ll see your device listed on the screen immediately following step 1 above. | 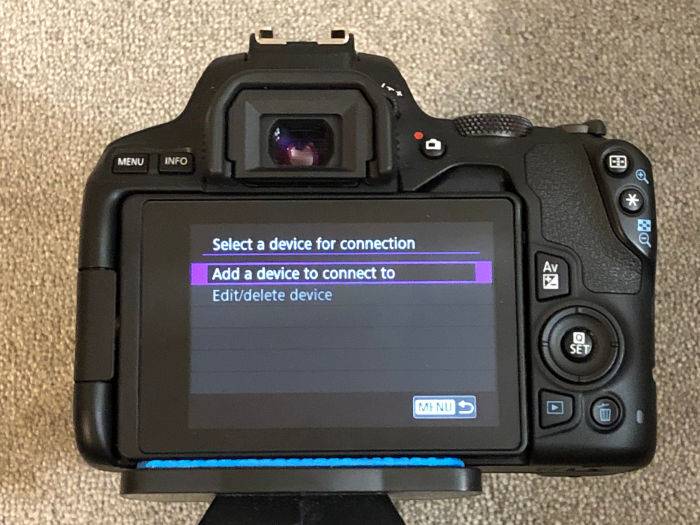 |
| 4. The camera is now waiting for the computer to connect to the camera. On this screen, you will see the SSID of the camera’s WiFi network and the password that you’ll need to complete the connection. | 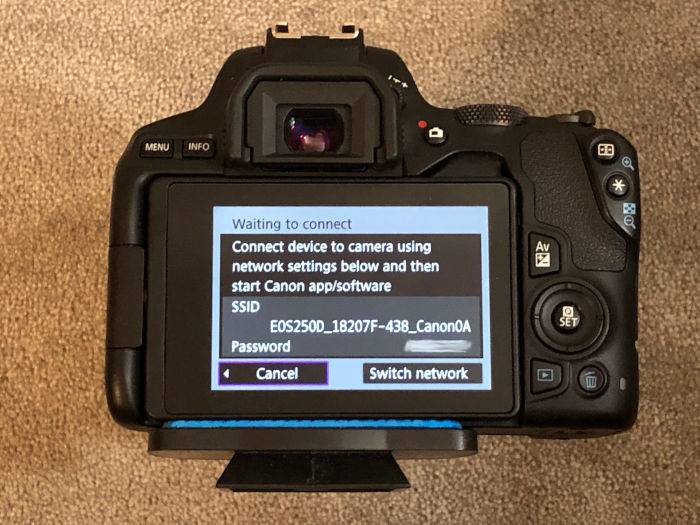 |
Step 2 – Connect the Computer to the Camera’s WiFi network
With the camera ready to pair, switch to the computer that you’ll use to connect to the camera. Simply open up your wireless settings on the computer and search for the SSID network shown on the camera screen. Select the network and enter the password shown on the camera screen.
You’ll now be prompted on the camera to click “OK” to start pairing the devices. The camera will now indicate that you need to launch the EOS Utility on your computer.
Step 3 – Launch the Canon EOS Utility on Your Computer
| 1. Launch the Canon EOS Utility on your computer | |
| 2. From the EOS Utility Launcher, select Pairing over WiFi/LAN. | 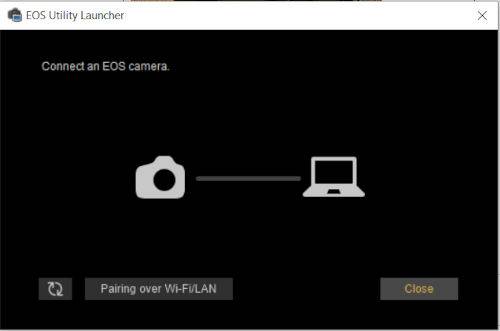 |
| 3. Next, click on the camera in the menu presented and then click “Connect”. Return to the camera and click “OK” to establish the WiFi connection. | 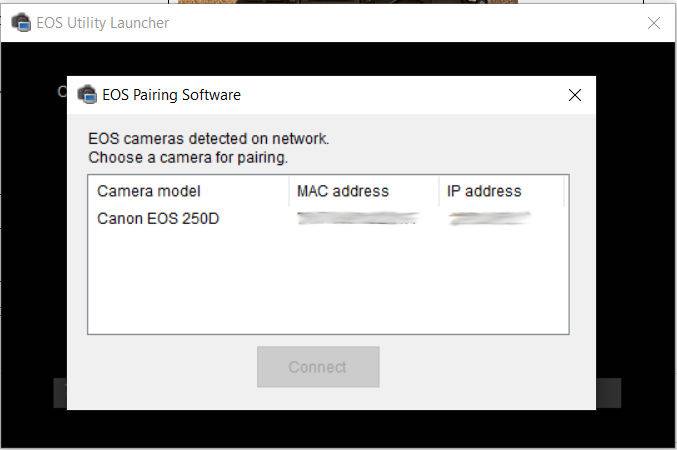 |
| 4. Your computer is now connected to the camera. There are a few options that you can select from here but simply go to the next step for now. | 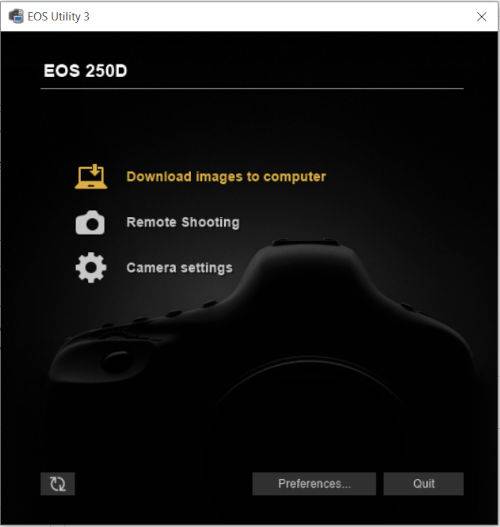 |
Step 4 – Connect to Astro Photography Tool (APT) for Wireless Imaging
Here’s where things get a little dicey. Of course, you can attempt to connect your camera now in APT, but you may discover as I did that it won’t communicate properly. So, the next set of instructions will ensure that you’ll be able to use APT wirelessly. Even if this does seem a bit of a weird workaround.
| 1. In the EOS Utility, click on “Remote Shooting” |  |
| 2. This brings up the Canon remote shooting screen. Go ahead and close the window when it appears by clicking the “X” in the top right corner. You read this correctly, you want to close this window. Even though you’ve closed the remote shooting program, you are still wirelessly connected to your camera. For whatever reason, APT doesn’t seem to want to communicate with your camera if this window is active. It also doesn’t want to communicate if you stay on the previous screen and launch APT. I don’t know why this is and this was very frustrating to try and figure out. | 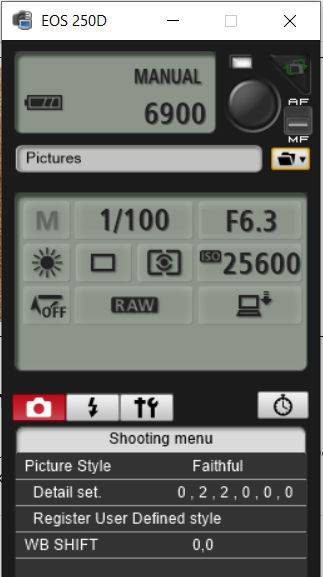 |
| 3. Launch APT. Your camera will connect automatically once the program loads. You’re now all set to run your imaging session wirelessly. You can test that everything works by clicking on Live View to ensure you have camera control. | 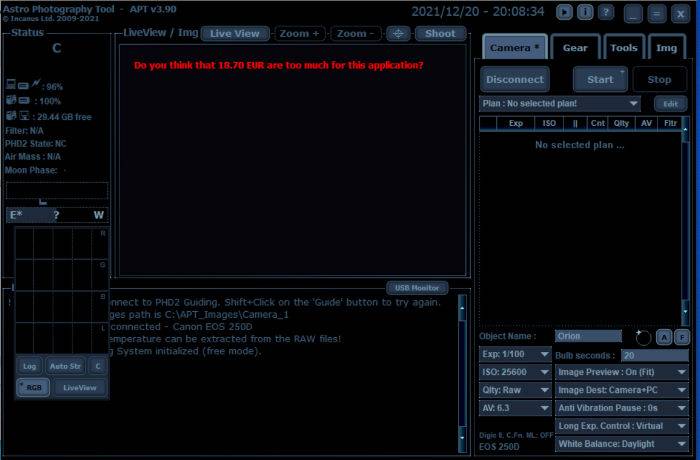 |
Wireless Imaging with APT Verdict
While it is a little non-intuitive, it’s possible to connect a Canon EOS camera to APT wirelessly for wireless imaging. I’ve been evaluating APT for a couple of months now and I’ve been very happy with it. It has an “unlimited” trial so you can really put this through its paces and ensure that it’s what you’re looking for. I’ll be purchasing a licenced version in the very near future because I believe it’s worth it.
This setup is going to be great for a number of reasons. First, it physically isolates my camera from my computer. This will help avoid any unwanted vibrations from dangling cables. Also, it allows me to set up my computer a little further away from my camera which cuts down on the potential for light radiation from my computer making its way into my photos.
Although, there is no such thing as a free lunch. The tradeoff is that while I’m connected wirelessly to my camera, I won’t be connected to my home WiFi network. This will prevent some of the features that APT offers that require an internet connection from working. I think I’m fine with that for now.
