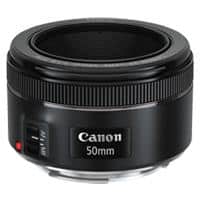
Something To Look Forward To
Things have been quite busy for me lately. But that hasn’t stopped me from making my first new prime lens purchase. I decided to go ahead and pick up a little lens that folks call the nifty-fifty, or Canon EF 50mm f1/8 STM. You see, we’ve always set aside time as a family to get away for a week or two every summer together. This year, my wife booked us a cottage in the Northern village of Kopalino, Poland. And this sleepy little town sits about a mile away from the Baltic Sea.
Now I love being around the water so I was already pretty excited about getting away. But imagine my enthusiasm when I discovered that Kopalino is located in a Bortle 4 zone. This is a significantly darker location than where I am used to taking photos.
I need to make the most of this opportunity – skies willing. Which is why I decided to make this purchase now. Enter the very affordable Canon 50mm f/1.8 STM. I know, I know, my immediate temptation is to go long here. But, 50mm is a great utility focal length that once again, I’ll be able to use for other things. Besides, the main decision criteria for my first prime lens is speed. And for just North of $100 brand new, the price was right.
Vacation Goals
Weather permitting, my main goal during vacation is to get some serious imaging time with Andromeda. I didn’t mention this, but I shot a handful of test shots the other night on the 18-135mm lens while just playing around and was surprised at how easy Andromeda was to find in the sky even just outside of Krakow.
50mm will be a great focal length to take my first serious images of Andromeda. But before we get to the seaside, I need to put this lens to the test.
Testing the 50mm
Before we hit the road, I needed to get a sense of how this lens will perform. To do this, I created a plan to take a series of 10-shot photos at different apertures and ISOs to hopefully begin to tease out some sweet spots. Here’s what I spent the night shooting:
| Aperture | ISO 800 Lights | ISO 800 Shutter | ISO 1600 Lights | ISO 1600 Shutter | ISO 3200 Lights | ISO 320 Shutter |
|---|---|---|---|---|---|---|
| 1.8 | 10 | 1.6 | 10 | 1.6 | 10 | 1.6 |
| 2 | 10 | 1.6 | 10 | 1.6 | 10 | 1.6 |
| 2.2 | 10 | 1.6 | 10 | 1.6 | 10 | 1.6 |
| 2.5 | 10 | 2 | 10 | 2 | 10 | 2 |
| 2.8 | 10 | 2 | 10 | 2 | 10 | 2 |
| 3.2 | 10 | 2 | 10 | 2 | 10 | 2 |
| 3.5 | 10 | 2 | 10 | 2 | 10 | 2 |
| 4 | 10 | 2.5 | 10 | 2.5 | 10 | 2.5 |
| 4.5 | 10 | 2.5 | 10 | 2.5 | 10 | 2.5 |
| 5 | 10 | 2.5 | 10 | 2.5 | 10 | 2.5 |
Of particular interest to me in this testing is to gauge the lens aberrations at different aperture settings. This lens is notorious for coma distortion. However, I don’t expect that will be much of a problem for me if I know where in my shot this effect (and others) will appear. Besides, I’m going to be cropping my photos down. So as long as I can frame and keep my target in the sweet spot, I should be alright.
For this testing, I decided to just step onto my back porch to take pictures. I wasn’t overly concerned about the light pollution and accepted that I might have a more significant gradient to deal with in my photos. So be it. This was just going to be more comfortable for me.
What is Coma?
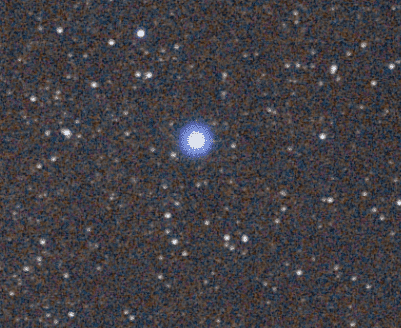
The coma at the low aperture settings was immediately obvious and to give you a sense of what I mean:
These are your stars (Deneb)
These are your stars on coma
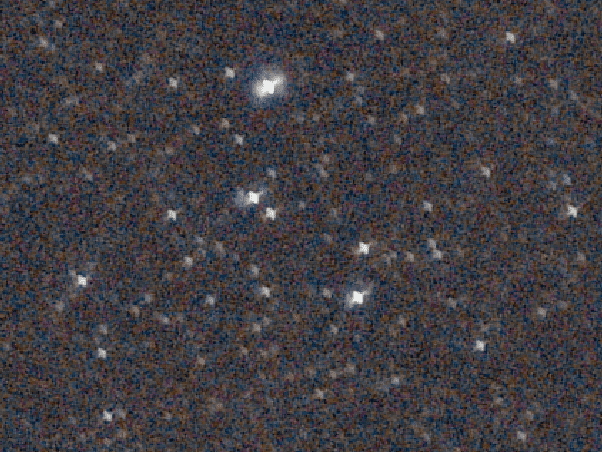
As you move away from the center of your shot, your stars begin to look like they’ve been drinking excessive amounts of Red Bull. Now, where this distortion begins to appear is very much dependent on your aperture setting. The coma is almost unnoticeable once you get beyond f/4 but at f/4 and lower, you need to mind your target framing.
Coma Characterization
Below is a full stop comparison of coma impact. The light circles are where the stars appear crisp and outside of the light circle is where the coma effect becomes apparent. As you can see, there is quite a trade-off in the field of view.
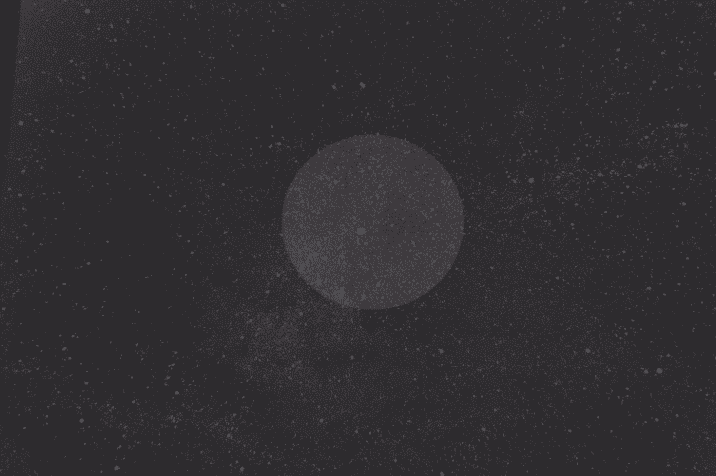


I’m really glad I went through this exercise as tedious as it was. Now, this is knowledge that I can use. Nothing would have been more disappointing than to have spent a good night imaging only to see in post-processing that the lens effects ruined the photo.
I mentioned that I was also sweeping the ISOs. I wish I had more to talk about here, however, the truth is that finding the appropriate ISO setting to image with is still a bit of an enigma to me.
Nifty-Fifty First Impression
I’m already loving this lens for a number of reasons. First, it’s light. Second, the speed of the lens allows me to gather a lot more light than with the kit lens and the difference is definitely noticeable – even after only one session. Third, it wasn’t terribly expensive. Fourth, the field of view is wide which allows me to take pictures of larger regions of the sky. And it makes finding my targets a lot easier. Finally, the images and colors are really crisp.
However, everything that I just mentioned is relative. You need to remember that just a couple of months ago, I didn’t know the first thing about photography. What I can easily observe is that this prime lens is a big step up for me from my kit lens. Of course, I’ll still be using the kit lens. But now, I’ll be thinking more about what I’m trying to do when I image in order to determine which of my lenses would be more fit for purpose.
The only thing I need to do now is getting to the seaside and start shooting!
