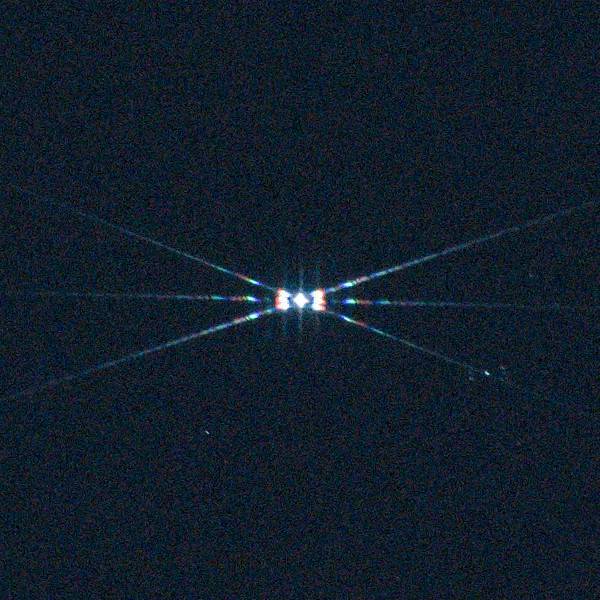
Suddenly I realized that I have quite a few things to talk about. Hmmm, perhaps I should have been posting more. Well, that’s on me. So let me begin to make that up by revisiting an old but essential topic, Bahtinov masks. The reason for this is that recently I struggled a bit when testing the Canon 75-300mm f/4-5.6 to really dial in my focus. At 300mm and f/5.6 the diffraction pattern of the Bahtinov mask I downloaded was so faint that I could barely see it. It dawned on me that I was going to have a similar issue when stopping down the Samyang 135mm f/2 lens as well. So today I thought I’d write a bit about printing a Bahtinov mask that is more suited to my particular requirements. I want to cover this in general, but then more specifically for my Samyang 135mm f/2 lens.
Overcoming Initial Challenges
Up to this point, I’ve been living vicariously through the work and designs of other people when it comes to Bahtinov masks. There’s absolutely nothing wrong with this. But my skills with taking photos has been slowly improving as has my prowess in the area of 3d-printing. So I’m feeling a little cocky at the moment and want to create my own mask tailored to my own requirements.
Basically, I have two design challenges. First, how does one go about designing a pattern for a Bhatinov mask? And secondly, can I actually print it?
No Need to Reinvent the Wheel
When it comes to the first challenge, fortunately, there is already a Bahtinov Mask Website Generator available online. That’s the good news. The bad news is that it’s not really intuitive as to how to use it. However, I stumbled across a really great article on the Inner City Astronomy blog which was incredibly helpful in understanding how the various settings in the generator impact the diffraction pattern. I definitely recommend reading this article before using the generator. With this information, I created the following mask pattern for the Samyang 135mm f/2 lens.
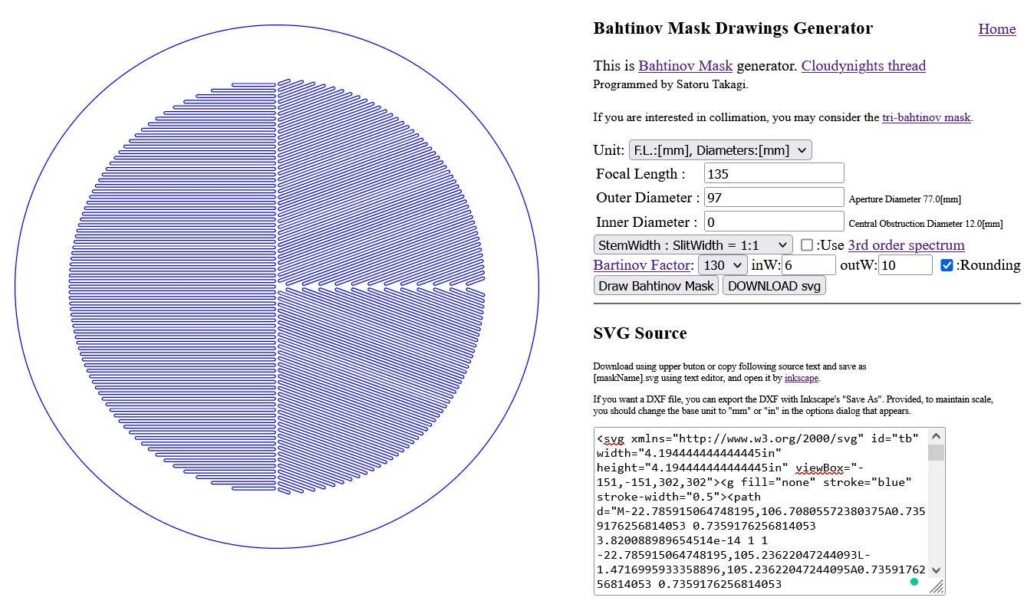
Worth mentioning here, I set the outer diameter to 97mm so I’d have a little extra room to fit this over the opening of the Samyang 135mm lens hood. Then I adjusted the “outW:” setting (the solid space on the outside of the mask) to adjust to my aperture diameter of 77mm. I want a bright diffraction pattern with long spikes. So I left the StemWidth : SlitWidth = 1:1 and set the Bahtinov Factor to 130mm. I want the stem and slit width to be about 0.5mm each.
This is an aggressive pattern, I know. So I also designed a mask using the 3rd order spectrum and a Bahtinov Factor of 200. I know this will print without a hitch and I’ll use this design as my failsafe.
The only thing left to do is click the “Draw Bahtinov Mask” button and then the “Download svg” button. Now let’s bring this into FreeCad and start working with it!
All Was Not Well At First
If there’s ever a problem, I’m sure to find it. I fired up FreeCad 0.19 and tried importing the svg file. However, this didn’t work. For some strange reason, not all of the vectors in the drawing were closed. I used a number of programs to check the file and they all showed the correct image, but for some reason, FreeCad didn’t want to play nice.
So in an act of desperation, I downloaded the latest stable version of FreeCad which is 0.20. And guess what – It worked a treat! Therefore, if you’re going to use FreeCad to import your svg file, make sure you are using version 0.20.
Importing the svg File into FreeCad
Here are the steps I used to import my svg file into FreeCad. A lot of credit goes to TheMarkster in the FreeCad Forum for guiding me through much of the process below.
| 1. In FreeCad 0.20, click File>Open and select the svg file that you saved. You want to import the svg file as a geometry when prompted. If you are directly importing the svg file, you will see a popup dialog asking if you want to continue using 96dpi if absolute units cannot be found. 96dpi is what Inkscape uses today for vector graphics so simply click Yes to continue. | 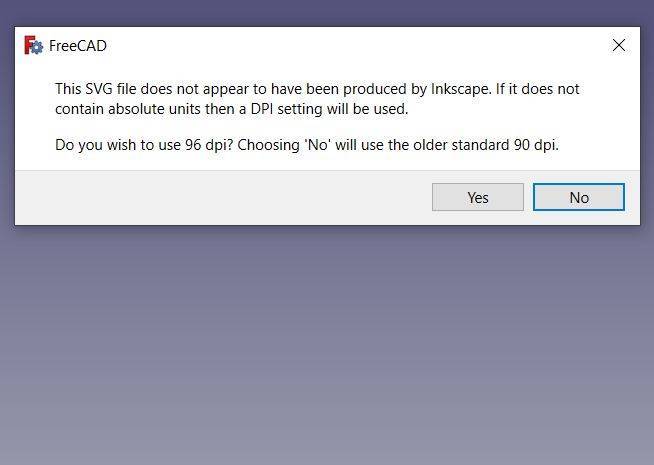 |
| 2. Change the FreeCad Workbench to “Draft”. Then left-click the first Path component in the Combo View and hit ctrl-a to select all the Paths. |  |
| 3. Click the “Draft to Sketch” icon on the Draft toolbar. You can also find this by clicking Modification>Draft to Sketch from the Menu Bar. When complete, you can delete everything but the Sketch Component. |  |
| 4. Change the FreeCad Workbench to “Part”. At this point, you can remove the draft grid by hitting “g + r” on your keyboard. Left-click on the sketch component in the Combo View and then click Extrude. I set my extrusion to be 2mm high. | 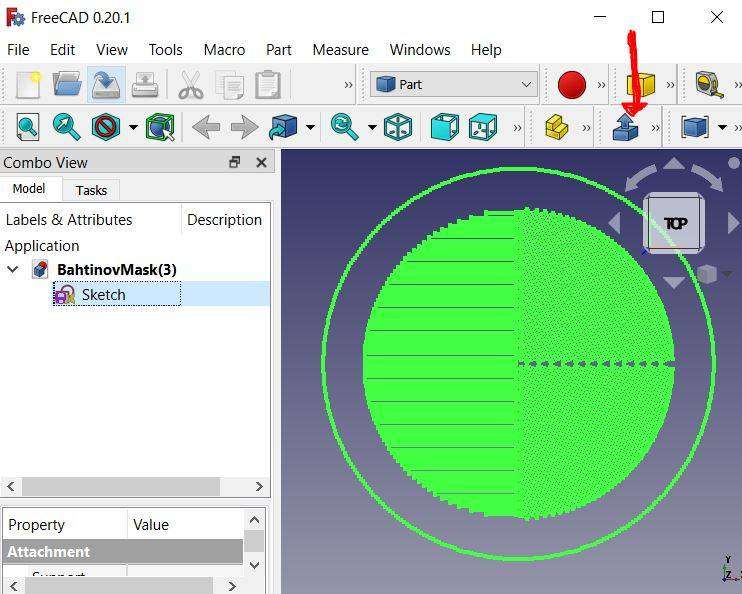 |
| 5. You now have an extruded part that you can further modify. As you can see to the left, the stem plus the slit width is 1.04mm. | 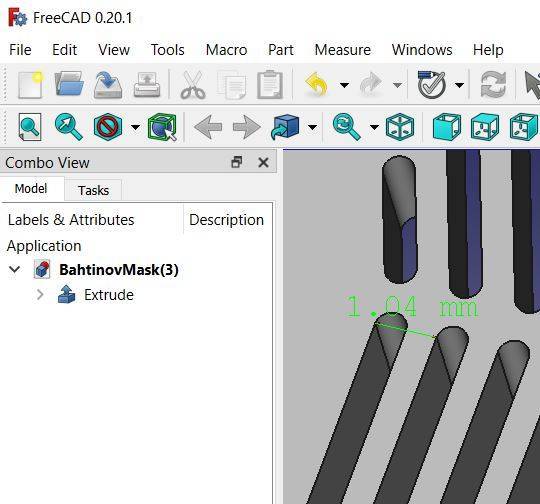 |
If you’re interested, I’ve added the FreeCad fcstd file for my mask design to my 3D Printed page.
Printing A Bahtinov Mask
With the design completed, it’s now time to print the mask. Here’s the challenge. The extruder in my Flashforge Adventurer 3 is a 0.4mm nozzle. I’m going to attempt to print stems that are about 0.5mm wide. Effectively, this means that my stems will only be one extrusion pass wide when they print. Can my printer do this? I wasn’t sure, to be honest.
What I can say is that I never would have attempted to do this had I not made some modifications to my printer and tightened everything up. I ended up printing 2 masks. The first mask I printed was the fine-stem mask without a raft. The second mask I printed was the 3rd order spectrum mask I mentioned previously with a raft. Both masks printed fine. But my advice would be to print without the raft if you can trust your printer tolerances. This will ensure that you won’t be bending or breaking any of the fine stems when you remove the raft. I also reduced the bed temp a wee bit to prevent warping.

Not the best photo, I know. But here you can see 3 Bahtinov masks that I’ve printed to date for my Samyang 135mm f/2 lens. The red mask on top is the mask I’ve been using since January of this year. The bottom left mask is the 3rd order Bahtinov mask, and the bottom right is the Bahtinov mask with the fine stems.
Tips for Printing
The following represents the best advice I can give at this time to successfully print a fine-stem Bahtinov mask.
- Ditch the Raft – You’re already doing this if you’re printing on glass. But if you’re not using glass, you really need to tune your bed prior to printing to ensure a good flat print surface. It’s just safer to print this way so you won’t damage your thin stems.
- Slow Down – Slow wayyyyyyyyy down. I dialed my extrusion speed and travel speed way down. I printed at 30mm/s and traveled at 40mm/s. It was painful to watch the mask print this slow, but slow and steady wins the race. The stems really need to be laid down correctly and you’re just not going to do this quickly. Both masks took about 3.5 hours each to print.
- Cool Down – Leave the part on the bed for 15 or 20 minutes after the print finishes to cool down. This will mitigate any warping issues that you will have if you pull it out hot/warm. You’ve already waited 3.5 hours, what’re another 20 minutes?
- Other Details – I printed with eSun PLA+ at 225 degrees Celcius and a bed temperature of 50 degrees Celcius. I printed using standard settings (except for the speed) – ie. infill 15%, shells 2, layer height .18mm. In hindsight, I might have switched to a fine profile but it’s already done…
Testing the Bahtinov Masks
Once printing a Bahtinov mask is complete, it’s time to test the result. The following are the results obtained when focusing on Vega about 45 minutes after sunset. I would have waited a bit longer, but I could see Vega and I knew there was a bit of rain on the way…
| Old Mask | New Fine-Stem Mask | New 3rd Order Mask |
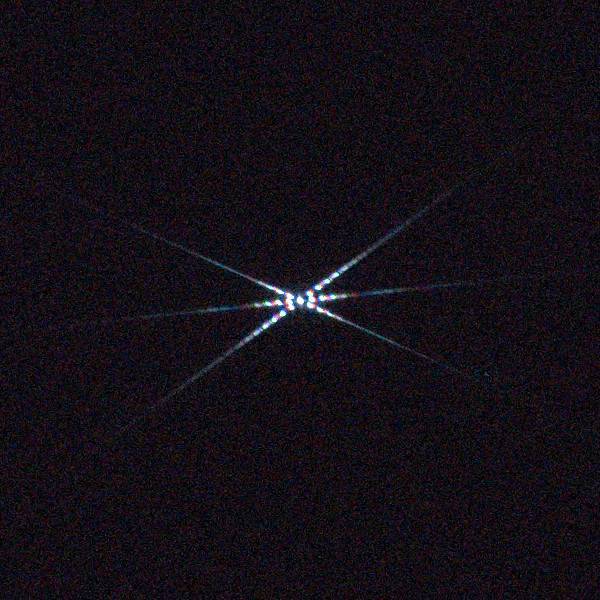 |  |  |
All images zoomed to 100% and centered on Vega. The image on the left is the mask that I’ve been using since early this year. It’s been a good mask for me but I needed a bit more performance. It just got too dark when stopping down and it was a bit grippy when attaching/removing from the lens. You can see that both new masks that I printed are much brighter from these test shots. Even slightly overexposed. The big difference that you can see though in the new masks is the distribution of the brightness. The finer stems have much longer and brighter spikes whereas the 3rd order mask concentrates the light a bit in the center of the star. I’m happy to call both masks a success but I’ll definitely be using the new mask with the finer stems moving forward.
Printing a Bahtinov mask may seem intimidating at first. But with a little help via design tools and careful attention to printing parameters, you can custom print your own mask for any of your lenses. I’m happy I took the time to do this as I’m working on another project with the Samyang 135mm lens where having an accurate and easy-to-attach/remove Bahtinov mask will be clutch. Stay tuned.
