Another cloudy night has come and gone. If I wasn’t still feeling a bit out of sorts from my bout with Covid, I’d probably be pretty bummed. And with the weather looking pretty crummy over the next week, I’ve got to find something to keep myself busy with this hobby. So, as I previously mentioned, I’m going to put my 3D printer to work and I’m going to build a 3D-printed star tracker for my next astrophotography project.
Yes, yes, I already have the Lego Star Tracker which is great, but one thing I probably won’t do with that tracker is travel with it. So I’m looking to build something that will be a little more sturdy and portable. I’ll use the knowledge I’ve gained with the Lego Star Tracker to build something that I can pack around. As I did with that project, I’m going to start with a basic set of design rules.
3D-Printed Star Tracker Design Requirements
I’ll need to be a little more careful than I was with the Lego Star Tracker. The nice thing about Legos is the ease with which you can simply rebuild a design. It’s a great medium to experiment and prototype. I’m not going to have that luxury with a 3D-printed star tracker. The following are the initial requirements that I’m going to set up for this project.
- Low power: I want to be able to run the star tracker with a powerbank
- Minimal moving parts: This includes the gear train that I’ll need to design. But basically, I just want the tracker to track.
- Minimal size: I’m thinking about half the size of the Lego Star Tracker
- Simple electronics: Yeah, I’m already dreaming of whipping up a React Native app to control this via Wi-Fi or Bluetooth. But for starters I think I’ll just stick to a microcontroller, driver, and a motor as the primary components.
- Integrated design: I want everything aside from the powerbank to be integrated in the tracker.
- Inexpensive: You’ll notice this is a theme with me. For now, I’d like to keep it under $100. Cheaper would be even better.
- Tripod mountable: I want to be able to mount the star tracker on my tripod.
- Support up to 3kgs: I really really really want to be able to mount the Samyang 135mm f/2.
- Fine-tunable: If I’ve learned anything from the Lego Star Tracker it’s that I need to be able to make fine adjustments to my alignment. I’m going to build this into the design.
Taking Inspiration
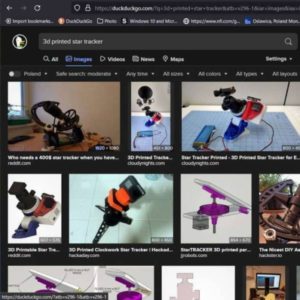
There are a lot of very clever DIY star tracker solutions online. I don’t necessarily feel the need to start from scratch here. So I’ve been doing some research to take some inspiration. I came across a pretty simple design by a man named SimonRob who published an instructable for his design. I really like the simplicity of his design and the more I think about it, the more his approach appeals to me. I’ll be designing my project from scratch, but I will borrow heavily upon some of his concepts.
Now, SimonRob’s design is clean and clever. I’m not going to be critical of his design choices, but there are some things that I will definitely be working on changing. As I learned with the Lego Star Tracker, balance and friction are still my enemies. I can definitely see that I’ll want to develop a design that gives me more options for balancing. On the friction front, it’s all going to come down to the 3d-printed gears that I design for the gear train. And there will be a gear train. I don’t want torque to be an issue if I mount the Samyang 135mm f/2. Additionally, I don’t want to be limited by the rotation rate and focal length.
Challenges on the Horizon
I can see a number of challenges ahead with this project. My ability to polar align is going to be just as important with this project as it was with the Lego Star Tracker. I need to design a tunable mount that allows me to make fine adjustments to my alignment. I’m tempted to simply use my tripod head, but I know that will likely end in disaster as it’s not a high-end piece of equipment. I’d like to be able to lock it in place and use the mount to make my fine adjustments. That will require a custom wedge to mount the tracker.
Next, I’ve been playing with 3D-printed gears and while they are totally awesome, they are anything but smooth. I’m definitely thinking of using a worm gear but that is going to depend on whether I can design a pair that won’t introduce a lot of mechanical vibration. This might be tough, but we’ll see.
Finally, I would like to include a clutch in this design so the camera arm can swing freely. This will help me balance the rig when I’m setting it up. But I think this will be challenging to accomplish, especially if I’m dead set on using a worm gear to drive the output.
Next Steps
Alright, that’s about all I can think of for now. Now I just need to get into it. I’ll start by designing and building a 3D-printed wedge. Once that’s done, I can turn my attention to the actual tracker. I’ll need to source the electronics and find a supply for ball bearings. I’m not sure about the latter, but I’ll start browsing Mouser for the former to get some ideas. I may go real cheap with the electronics at first as a proof of concept and then upgrade from there.

